What is TestNG: Complete Guide for Selenium Automation

TestNG is a testing framework widely used with Selenium for building structured, maintainable, and efficient automated tests. It helps teams move beyond simple sequential runs by adding features like grouping, prioritization, parameterization, and parallel execution. These options make it easier to align test design with real project requirements.
Another advantage of TestNG is its compatibility with other tools. It works well with build systems like Maven and offers detailed reporting, which supports both individual contributors and larger QA teams managing complex projects.
This guide covers TestNG basics, JUnit comparison, annotations, suites, issues, and best practices for Selenium automation.
CTA: Run Selenium Tests on Cloud
What is TestNG
TestNG is a Java-based testing framework used for unit, functional, integration, and end-to-end testing. The name stands for "Test Next Generation," highlighting its design as an improved alternative to older frameworks like JUnit.
It provides annotations that define how test methods behave during execution and supports configuration through XML files. These features make it suitable for organizing and running automated tests, including those built with Selenium.
Why Use TestNG in Selenium Automation
Selenium alone provides browser automation but lacks advanced test management features. TestNG fills this gap by handling execution flow, grouping, and reporting. It makes automation projects more organized and easier to scale in real-world test environments.
Here are the main reasons TestNG is used with Selenium:
- Flexible test execution: TestNG allows test methods to run in a defined order, with priorities or dependencies. This prevents unstable runs and ensures critical flows are always tested first.
- Parallel testing: Instead of running one test after another, TestNG can run tests across multiple browsers or environments at the same time. This saves execution time, which is important when regression packs contain hundreds of test cases.
- Parameterization support: Data can be passed into tests without hardcoding values. This helps when the same script must run with different inputs, like user credentials or environment-specific URLs.
- Grouping and tagging: Test cases can be grouped into categories such as smoke, regression, or functional. Teams can then selectively execute only the required group rather than the entire suite.
- Detailed reporting: TestNG generates HTML reports that show which tests passed, failed, or were skipped, along with error stack traces. This gives testers and developers immediate feedback for debugging.
- Integration with build tools: TestNG works smoothly with tools like Maven and Jenkins, enabling continuous testing in CI/CD pipelines. This is a key advantage for teams running automated tests on every build.
Differences Between TestNG and JUnit for Selenium Testing
JUnit was the first widely adopted testing framework for Java, while TestNG was developed later to address its limitations. For Selenium automation, TestNG provides features that make it more suitable for managing large and complex test suites.
Here’s a table highlighting the core differences between TestNG and JUnit for Selenium testing.
TestNG Annotations and Their Use Cases
Annotations in TestNG control how tests are set up, executed, and cleaned up. They define the sequence in which methods run and are essential for managing Selenium test suites effectively.
Below are the most commonly used annotations with their practical use cases:
- @BeforeSuite / @AfterSuite: Run once before and after the entire test suite. Typically used for initializing or closing resources that apply to all tests, such as database connections, Selenium Grid setup, or server configuration.
- @BeforeTest / @AfterTest: Run before and after all test methods defined inside a <test> tag in the XML file. Useful for environment-specific setup, such as loading configuration files or creating browser instances for a given test set.
- @BeforeClass / @AfterClass: Run before and after the first and last test methods in a class. This is where browser setup and teardown for a particular test class is often handled in Selenium.
- @BeforeMethod / @AfterMethod: Run before and after every individual test method. Commonly used for logging into an application before a test and logging out or clearing session data after it finishes.
- @Test: Marks a method as a test case. Parameters like priority, groups, and dependsOnMethods provide additional control over how the test runs.
- @DataProvider: Supplies test data to methods, supporting parameterized testing. Ideal for Selenium tests that need to run against multiple sets of inputs, such as different user credentials or browsers.
- @Parameters: Reads values directly from the XML configuration file and passes them to test methods. Often used for passing URLs, environment values, or browser types.
Role of Test Suites in TestNG
In TestNG, a test suite is a configuration that defines how groups of tests are executed together. It allows testers to run multiple classes in a structured way, apply shared settings, and manage execution at scale. For Selenium automation, suites are important because they bring order and flexibility when dealing with large test packs.
Here are the key roles test suites play in TestNG:
- Centralized execution: Suites bring multiple test classes together so they can be executed in a single run. This helps when regression or smoke packs include hundreds of cases spread across classes.
- Selective control: Suites let you specify which tests to run and which to skip. For example, a tester can create separate suites for smoke, regression, or cross-browser testing and run only the needed set.
- Parallel runs: Suites support parallel execution defined in the XML file. This is especially valuable in Selenium automation, where reducing execution time is a priority when running across multiple browsers.
- Environment configuration: Suites provide a place to configure parameters like browser type, base URL, or system properties that apply to all included tests. This reduces duplication and keeps the framework consistent.
- Dependency management: Suites handle dependencies between classes or groups, ensuring that critical test flows run in the correct sequence. This prevents failures caused by missing preconditions.
- Reporting alignment: Since suites define the structure of test execution, the reports generated are also aligned with the suite structure. This makes it easier to trace results back to specific groups or modules.
How to Create and Configure a Test Suite in TestNG
Creating a test suite in TestNG is about defining which classes to run and how they should run. The suite is described in an XML file, which gives testers full control over structure, order, and configuration. This XML-based setup is one of the main reasons TestNG is well-suited for Selenium projects where execution often spans multiple environments and browsers.
Here are the main steps for creating and configuring a suite:
- Create a testng.xml file: At the root of your project, add an XML file (usually named testng.xml). This file will hold suite and test definitions.
- Define the suite: Start with the <suite> tag and provide attributes like name and parallel if needed. For example, <suite name="RegressionSuite"> identifies the suite clearly.
- Add tests inside the suite: Use the <test> tag to define a logical group of classes. Each <test> can include one or more classes. This is useful for grouping by module or feature.
- Include test classes: Within each <test>, specify <classes> and <class> tags that point to your Java test classes. This is where you decide which classes belong to the suite run.
- Set parameters: Use <parameter> tags to pass values such as browser type, environment URLs, or credentials. These parameters are mapped to methods through the @Parameters annotation.
- Control execution: Add attributes like thread-count and parallel at the suite or test level to enable parallel execution. This allows scaling across browsers or machines.
- Save and run: Once the XML file is ready, right-click on it in your IDE (such as Eclipse or IntelliJ) and select "Run as TestNG Suite." TestNG reads the file and executes tests as defined.
Prerequisites for Running TestNG Tests in Selenium
Before you can use TestNG with Selenium, the environment needs to be prepared. This ensures that the framework runs smoothly and integrates with your existing automation setup. The requirements are straightforward but important, especially when setting up a project from scratch or onboarding new team members.
Here are the main prerequisites:
- Java installation: TestNG is built on Java, so the JDK must be installed and configured in the system. Verify installation with the java -version command.
- IDE support: Most testers use Eclipse or IntelliJ IDEA. Both IDEs provide TestNG plugins that simplify suite creation and execution. The plugin can be installed directly from the IDE marketplace.
- Selenium libraries: Add Selenium client libraries to your project. This can be done manually by downloading the JARs or by using build tools like Maven or Gradle for dependency management.
- TestNG dependency: Add the TestNG JARs or declare the dependency in pom.xml (for Maven) or build.gradle. This gives your project access to TestNG classes and annotations.
- Browser drivers: Ensure that the WebDriver executables for Chrome, Firefox, Edge, or any other browser are available and mapped to the system path. Without drivers, Selenium scripts cannot launch browsers.
- Build tool setup (optional but recommended): Tools like Maven or Gradle help manage dependencies, run suites from the command line, and integrate with CI/CD pipelines. While not mandatory, they are useful for long-term maintenance.
How to Write a TestNG XML File for Executing Test Suites
The testng.xml file is the backbone of TestNG suite execution. It controls which tests run, how they run, and what parameters they use. A well-structured XML file makes execution predictable and easy to maintain, which is essential in Selenium projects where large test packs need to be organized.
Here is a simple example of a testng.xml file:
<!DOCTYPE suite SYSTEM "https://testng.org/testng-1.0.dtd">
<suite name="RegressionSuite" parallel="tests" thread-count="2">
<parameter name="browser" value="chrome" />
<test name="LoginModuleTests">
<classes>
<class name="tests.LoginTest" />
<class name="tests.PasswordResetTest" />
</classes>
</test>
<test name="CheckoutModuleTests">
<classes>
<class name="tests.CartTest" />
<class name="tests.PaymentTest" />
</classes>
</test>
</suite>
Key points to notice in this XML file:
- Suite definition: The <suite> tag names the suite and defines whether tests should run sequentially or in parallel.
- Parameters: The <parameter> tag sets values (like browser type) that can be injected into tests with the @Parameters annotation.
- Test grouping: The <test> tag groups related classes. Each group can represent a feature, module, or environment.
- Class inclusion: The <class> tags inside <classes> list the Java test classes that will be executed.
- Parallel execution: Attributes like parallel="tests" and thread-count="2" allow running multiple test groups simultaneously, which reduces execution time.
How to Run TestNG Tests in Selenium: Step-by-Step Example
Running Selenium tests with TestNG involves writing test classes, applying annotations, and executing them through a testng.xml file. The process is straightforward once the environment is ready.
Here is a step-by-step flow:
1. Create a new class
Write a Java class inside your test package. For example, LoginTest.java.
2. Add the WebDriver setup
Use @BeforeClass to launch the browser and open the application URL. This ensures the browser is ready before any test runs.
public class LoginTest {
WebDriver driver;
@BeforeClass
public void setUp() {
driver = new ChromeDriver();
driver.get("https://example.com/login");
}
}
3. Write the test method
Mark your test with @Test. Include assertions to validate expected behavior.
@Test
public void verifyLogin() {
driver.findElement(By.id("username")).sendKeys("admin");
driver.findElement(By.id("password")).sendKeys("password123");
driver.findElement(By.id("loginBtn")).click();
Assert.assertEquals(driver.getTitle(), "Dashboard");
}
4. Tear down the browser
Use @AfterClass to close the browser once all tests in the class are completed.
@AfterClass
public void tearDown() {
driver.quit();
}
5. Create a testng.xml file
Add your class inside the <classes> section.
<!DOCTYPE suite SYSTEM "https://testng.org/testng-1.0.dtd">
<suite name="SampleSuite">
<test name="LoginTests">
<classes>
<class name="tests.LoginTest" />
</classes>
</test>
</suite>
6. Execute the suite
Right-click the XML file in your IDE and select “Run as TestNG Suite.” The test will launch the browser, run the login case, and generate a report.
Troubleshooting Common Issues in TestNG
Even with proper setup, TestNG users often face issues during Selenium automation. These problems usually relate to configuration, annotations, or environment mismatches. Identifying the root cause quickly helps avoid wasted time and ensures tests remain reliable.
Here are the most common issues and how to address them:
- TestNG not detected in IDE: This often happens when the plugin is not installed or the project is missing TestNG dependencies. Confirm that the TestNG plugin is enabled and that the JARs or Maven dependencies are present.
- Browser not launching: If the WebDriver executable is missing or not mapped to the system path, Selenium will fail to start the browser. Download the correct driver version and make sure it matches the browser installed.
- Annotations not working as expected: A frequent mistake is mixing JUnit annotations with TestNG or using the wrong order. Check that all methods use TestNG-specific annotations like @BeforeClass instead of JUnit equivalents.
- Test dependencies failing: When using dependsOnMethods or dependsOnGroups, a single failed test can skip all dependent ones. Ensure dependencies are logically necessary and avoid over-chaining.
- Parameter injection errors: If parameters from testng.xml are not mapped properly, TestNG throws errors at runtime. Verify that parameter names in the XML match those in the @Parameters annotation.
- Parallel execution issues: Running tests in parallel can cause session conflicts if WebDriver instances are shared across threads. Use thread-safe initialization, such as creating a separate driver instance for each thread.
- Report not generated: This usually happens when the suite crashes before completion or when reports are disabled. Check the test-output folder in the project and ensure the suite runs without interruption.
Best Practices for TestNG Automation
TestNG gives flexibility, but its value comes from applying it with discipline. Below are core best practices that improve reliability and maintainability in Selenium projects.
- Keep tests isolated: Each test should handle its own setup and teardown to avoid hidden dependencies and make failures reproducible.
- Thread-safe WebDriver: In parallel runs, create a new driver instance per thread. Sharing drivers across threads causes session conflicts.
- Use Page Object Model: Store locators and page actions in page classes, and keep validations in test classes for clarity and reusability.
- Prefer explicit waits: Replace hard-coded waits with explicit waits like WebDriverWait to reduce flakiness and handle dynamic elements.
- Parameterize inputs: Use @DataProvider and @Parameters to run tests with different datasets and environment-specific values without duplicating code.
- Retry carefully: Flaky tests should be fixed, but where retries are necessary, log them clearly so unstable cases remain visible.
- Capture diagnostics: Save screenshots, logs, and page sources on failure. These artifacts help developers identify issues quickly.
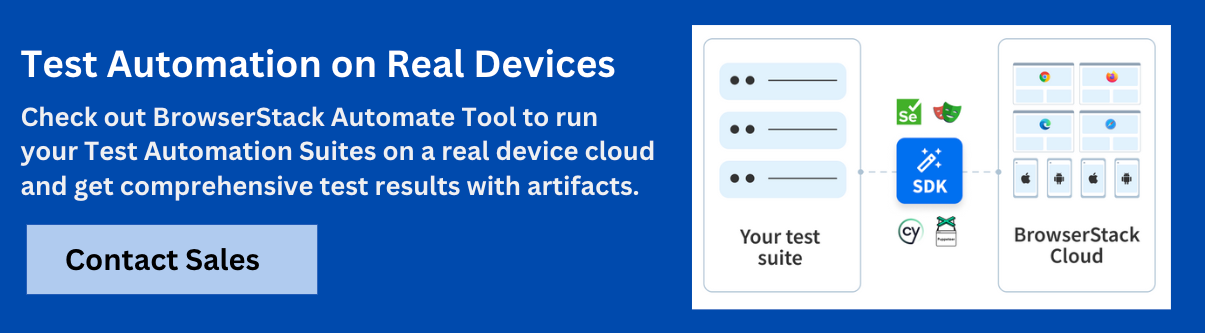
- Real device testing: Local environments cannot capture differences in OS, browser versions, and hardware. Testing on real devices uncovers these issues. BrowserStack offers a Selenium grid with real devices, parallel execution, CI/CD support, and debugging logs.
Conclusion
TestNG strengthens Selenium automation by providing structure, control, and flexibility. Its annotations, suite management, and configuration options help teams handle large test packs with fewer issues and greater efficiency.
When combined with good practices such as isolating tests, using explicit waits, parameterizing inputs, and validating on real devices, TestNG becomes a dependable foundation for long-term automation.
Data-rich bug reports loved by everyone
Get visual proof, steps to reproduce and technical logs with one click


Continue reading


Put your knowledge to practice
Try Bird on your next bug - you’ll love it
“Game changer”
Julie, Head of QA


Overall rating: 4.7/5
Try Bird later, from your desktop