What is a Selenium Grid and How to Set It Up?

Running automated tests on a single machine can slow execution and limit coverage. As test suites expand, this delay affects feedback speed and overall efficiency of QA cycles. A distributed setup is required to execute multiple tests in parallel across different browsers and environments without depending on a single system.
Selenium Grid addresses this challenge by enabling distributed test execution that reduces run time while covering a wider range of conditions. It helps QA teams validate applications faster without compromising on accuracy or environment diversity.
This article explains what Selenium Grid is, why it matters in test automation, and how to set it up locally.
Run Selenium Tests on Cloud
What is Selenium?
Selenium is an open-source framework used to automate browser actions. It provides libraries and tools that allow tests to interact with web elements the same way a real user would, such as clicking buttons, filling forms, or navigating between pages.
It supports multiple programming languages including Java, Python, C#, and JavaScript, which makes it accessible to teams with different tech stacks. Selenium also works across major browsers like Chrome, Firefox, Safari, and Edge, ensuring that automated tests reflect real-world usage.
Because of this flexibility, Selenium has become one of the most widely used tools for web test automation. It serves as the foundation for advanced setups like Selenium Grid, where tests need to run on distributed machines and environments.
What is a Selenium Grid?
Selenium Grid is a component of the Selenium suite that allows automated tests to run on multiple machines and browsers at the same time. Instead of executing all tests on a single system, Grid distributes them across different nodes connected to a central hub.
This setup enables parallel testing, where multiple test cases execute simultaneously. It also supports cross-browser and cross-platform testing, making it possible to check how an application behaves in varied environments without maintaining multiple physical setups.
Why Use Selenium Grid in Test Automation
Running tests on a single machine quickly becomes inefficient as test suites expand. Execution slows, coverage remains limited, and reproducing real-world conditions is difficult.
Here are the key reasons to use Selenium Grid:
- Parallel test execution: Multiple tests run at the same time, significantly cutting down overall suite duration.
- Cross-browser validation: Applications can be tested on different browsers and their versions without managing separate installations manually.
- Cross-platform coverage: Grid supports running the same test suite on Windows, macOS, and Linux, ensuring platform-specific issues are caught early.
- Scalability for large suites: Adding more nodes increases capacity, allowing thousands of tests to run in parallel when needed.
- Better resource utilization: Workloads are spread across machines, preventing one system from being overloaded while others remain idle.
- CI/CD integration: Grid can be tied into pipelines so that distributed tests run automatically with every code push or build.
- Environment flexibility: Different nodes can be configured with varied browser-driver combinations, giving precise control over test environments.
- Faster feedback loops: By reducing execution time, test results reach developers sooner, which helps resolve defects earlier in the cycle.
When to Use Selenium Grid vs Single-Node Runs
Running all tests on Selenium Grid is not always necessary. For small-scale projects, setting up a hub and multiple nodes can create overhead without clear benefits. The right choice depends on the size of the test suite, how often it runs, and the variety of environments that need to be covered.
You should use single-node runs when:
- The test suite is short and completes quickly on one machine.
- Only one browser or operating system needs to be validated.
- Tests are run mainly for smoke or functional checks during early development.
- Resources are limited and setting up distributed infrastructure is not practical.
Selenium Grid is better suited when:
- Test suites are large and take too long to finish on a single machine.
- Applications must be checked on multiple browsers, versions, and operating systems.
- Continuous Integration pipelines need tests to run in parallel to avoid delays.
- Teams require specific environment setups across different nodes, such as varied browser-driver versions.
- Scalability is needed to handle frequent or bulk test executions.
How Selenium Grid Speeds Up Test Suites
The speed improvements in Selenium Grid come from reducing idle time and avoiding sequential execution. Instead of running one test after another on a single machine, Grid spreads them across multiple nodes and manages their execution efficiently. The specific ways it accelerates test runs are:
- Parallel execution: Multiple test cases run at the same time on different nodes, so total duration drops sharply compared to sequential runs.
- Concurrent sessions on a node: A single node can run more than one browser session in parallel if configured, multiplying the number of tests executed at once.
- Environment-specific routing: The hub assigns tests to nodes that already match the requested browser and OS setup, so there is no time wasted on switching or reconfiguring environments.
- Isolation of failures: When one test fails on a node, other tests continue in parallel on different nodes, preventing delays caused by blocked runs.
- Faster cross-browser checks: Instead of testing Chrome, Firefox, and Edge one after another, Grid runs them simultaneously, keeping overall execution time nearly the same as a single browser run.
Selenium Grid 4 Architecture (Overview)
Selenium Grid 4 introduced a new architecture that is more modular and flexible compared to earlier versions. It is built around a distributed system of services that work together to handle test requests efficiently. Instead of a single hub and multiple nodes, Grid 4 uses a set of components that communicate through an event bus.
The main components are:
- Router: Receives incoming test requests and directs them to the correct service.
- Distributor: Decides which node should handle a specific test based on requested capabilities such as browser type, version, and platform.
- Session Map: Tracks active sessions and ensures each test request maps to the right node throughout execution.
- Nodes: Host the browsers and drivers where tests are executed. Each node can support multiple sessions depending on configuration.
- Event Bus: Manages communication between components, ensuring that updates about sessions, availability, and node status are passed reliably.
- New UI: Provides a web interface for monitoring sessions, nodes, and overall Grid health in real time.
Set Up a Local Selenium Grid (Hub + Node)
A local setup is the easiest way to understand how Selenium Grid works before moving to larger distributed systems. Follow these steps to get a hub and node running on your machine.
Step 1: Prerequisites and Environment Checklist
Before starting, make sure the following are ready:
- Java JDK 11 or higher installed and added to your system path
- The latest Selenium Server JAR file downloaded from the official Selenium website
- Compatible browser drivers such as ChromeDriver or GeckoDriver installed and accessible
- Installed browsers that match the driver versions
- Port 4444 available and not blocked by another process
With these prerequisites in place, you can launch the hub and nodes without setup errors.
Step 2: Start the Hub/Router
Open a terminal in the folder containing the Selenium Server JAR and run:
java -jar selenium-server-<version>.jar hub
Once it starts, open http://localhost:4444/ui in your browser to access the Grid console. This dashboard will display registered nodes and test sessions.
Step 3: Start and Register a Node
In a new terminal window, register a node with the hub using:
java -jar selenium-server-<version>.jar node --detect-drivers true
The node automatically reports available browsers and drivers to the hub. Check the Grid console to confirm that it is registered successfully.
Step 4: Configure Node Capabilities (Browser Types, Max Sessions)
You can control the types of browsers and the number of sessions a node will handle. For example:
java -jar selenium-server-<version>.jar node --max-sessions 5 --driver-implementation "chrome"
This configures the node to run up to five Chrome sessions in parallel. Adjust these values to match the resources available on your system.
Step 5: Run a Sample Test and Verify Execution
Update your Selenium test to point to the Grid hub URL (http://localhost:4444/wd/hub) instead of a local driver. Run the test and open http://localhost:4444/ui to confirm the session appears on the registered node. A successful execution verifies that the hub and node are working together.
Docker Compose Quickstart for Selenium Grid (Optional)
Running Selenium Grid with Docker is a faster alternative to manual setup. Docker containers package the hub and nodes together, making it easy to launch a Grid with just one command. This option is useful if you already have Docker installed and want a ready-to-use Grid without complex configuration.
Here’s a quick setup using Docker Compose:
1. Create a docker-compose.yml file with the following content:
version: "3"
services:
selenium-hub:
image: selenium/hub:4.23.0
container_name: selenium-hub
ports:
- "4444:4444"
chrome:
image: selenium/node-chrome:4.23.0
depends_on:
- selenium-hub
environment:
- SE_EVENT_BUS_HOST=selenium-hub
- SE_EVENT_BUS_PUBLISH_PORT=4442
- SE_EVENT_BUS_SUBSCRIBE_PORT=4443
firefox:
image: selenium/node-firefox:4.23.0
depends_on:
- selenium-hub
environment:
- SE_EVENT_BUS_HOST=selenium-hub
- SE_EVENT_BUS_PUBLISH_PORT=4442
- SE_EVENT_BUS_SUBSCRIBE_PORT=4443
2. Run the Grid with:
docker compose up -d
3. Open http://localhost:4444/ui to check that the hub and browser nodes are active.
This setup can be extended by adding more nodes or adjusting session limits in the configuration.
Integrating Selenium Grid with CI/CD Pipelines
Running Selenium Grid locally is useful for testing, but its real value appears when integrated into CI/CD pipelines. Grid ensures that tests run automatically with every code change, giving developers faster feedback and reducing defects before release.
You can integrate Selenium Grid into common CI/CD tools in the following ways:
1. GitHub Actions
Add a workflow step to spin up a Grid using Docker Compose, run the test suite, and shut it down after completion.
jobs:
test:
runs-on: ubuntu-latest
services:
selenium:
image: selenium/standalone-chrome:4.23.0
ports:
- 4444:4444
steps:
- uses: actions/checkout@v3
- name: Run tests
run: mvn test
2. Jenkins Pipeline
Define a stage that provisions Selenium Grid (either with Docker or on a dedicated agent), executes the tests, and publishes results.
pipeline {
agent any
stages {
stage('Test') {
steps {
sh 'docker compose up -d'
sh 'mvn test'
sh 'docker compose down'
}
}
}
}
Conclusion
Selenium Grid is designed to solve the limitations of running tests on a single machine. By distributing test cases across multiple nodes, it speeds up execution, improves cross-browser and cross-platform coverage, and aligns test environments with real-world usage. Setting it up locally, through Docker, or in CI/CD pipelines ensures that automation can scale as projects grow.
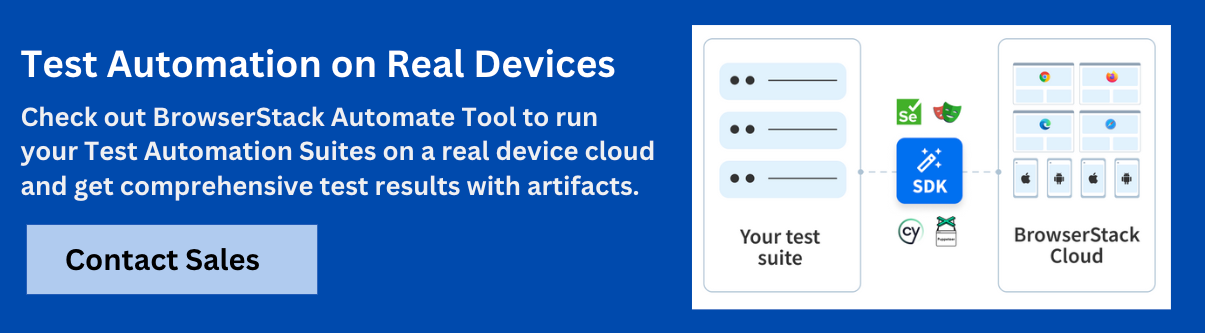
For real device testing at scale, BrowserStack provides a practical alternative to managing your own Grid. It offers instant access to thousands of browser and OS combinations, parallel test execution, and direct integration with popular CI/CD tools. This makes it easier to validate applications under real user conditions without the overhead of maintaining local or cloud infrastructure.
Data-rich bug reports loved by everyone
Get visual proof, steps to reproduce and technical logs with one click


Continue reading


Put your knowledge to practice
Try Bird on your next bug - you’ll love it
“Game changer”
Julie, Head of QA


Overall rating: 4.7/5
Try Bird later, from your desktop