Step-by-Step Guide to Using Selenium ChromeDriver on Chrome

Selenium cannot communicate with Chrome directly because the browser does not understand Selenium’s JSON Wire Protocol or W3C WebDriver commands on its own. ChromeDriver solves this gap by acting as the intermediary. It receives Selenium commands, translates them into Chrome’s native automation instructions, and sends the results back to Selenium.
This setup allows testers to run automation on Chrome in the same way users interact with it. Since ChromeDriver versions are tied to Chrome versions, choosing and configuring the right driver is essential.
This guide explains how to download, set up, and apply Chrome-specific features for reliable testing.
Run Selenium Tests on Cloud
How to Download ChromeDriver for Different Versions
Before starting any Selenium project on Chrome, you need to have the correct ChromeDriver binary installed. The driver version must always match the installed Chrome browser version. If there is a mismatch, Selenium will fail to start the browser, or tests may break unexpectedly. Google maintains ChromeDriver releases that align with specific Chrome versions, so identifying the right download is the first step.
Below are the steps for downloading ChromeDriver based on the browser version you are using:
Steps for ChromeDriver 115 and Above
- Open the Chrome for Testing availability page.
- Locate your installed Chrome version. You can check this by typing chrome://settings/help in the browser.
- Download the corresponding ChromeDriver zip file for your operating system (Windows, macOS, or Linux).
- Extract the binary and place it in a directory included in your system’s PATH environment variable.
Steps for ChromeDriver 114 and Below
- Go to the ChromeDriver downloads page.
- Find the ChromeDriver release that matches your installed Chrome version.
- Download the zip file for your operating system.
- Extract the binary and place it in a directory included in your system’s PATH environment variable.
How to Configure ChromeDriver in Selenium Projects
Once the correct ChromeDriver binary is downloaded, the next step is to configure it in your project. Configuration ensures Selenium knows where to find ChromeDriver so it can launch Chrome and execute commands. The setup differs slightly depending on the language and environment, but the principle is the same: the driver path must be registered before tests run.
1. Configuring in Java
In Java projects, you typically use the System.setProperty call to point Selenium to the ChromeDriver executable.
import org.openqa.selenium.WebDriver;
import org.openqa.selenium.chrome.ChromeDriver;
public class ChromeSetup {
public static void main(String[] args) {
System.setProperty("webdriver.chrome.driver", "/path/to/chromedriver");
WebDriver driver = new ChromeDriver();
driver.get("https://www.google.com");
driver.quit();
}
}
2. Configuring in Python
In Python, Selenium looks for ChromeDriver in the system PATH by default. If it is not set, you can provide the explicit path when creating the driver object.
from selenium import webdriver
driver = webdriver.Chrome(executable_path="/path/to/chromedriver")
driver.get("https://www.google.com")
driver.quit()
3. Using WebDriver Manager
Instead of downloading ChromeDriver manually and setting the path in your project, you can let WebDriver Manager handle it. This tool automatically detects your installed Chrome version, downloads the matching ChromeDriver, and makes it available to Selenium. It removes the need for manual configuration and reduces the chance of version mismatch errors.
For example, in Java:
import io.github.bonigarcia.wdm.WebDriverManager;
import org.openqa.selenium.WebDriver;
import org.openqa.selenium.chrome.ChromeDriver;
public class ChromeSetup {
public static void main(String[] args) {
WebDriverManager.chromedriver().setup();
WebDriver driver = new ChromeDriver();
driver.get("https://www.google.com");
driver.quit();
}
}
Here, you don’t need to call System.setProperty or keep updating the driver path. WebDriver Manager downloads the right binary for you.
Key Chrome-Specific Features for Selenium Automation
Once ChromeDriver is configured, testers can unlock Chrome-specific features that make automation more reliable and closer to real-world usage. These features go beyond basic browser control and allow fine-tuned testing of scenarios unique to Chrome.
Here are the most important Chrome-specific features you can use:
1. Setting Up ChromeOptions for Customization
ChromeOptions lets you control how Chrome launches. You can set arguments, preferences, and capabilities that define the browser environment. For example, you can start Chrome with a custom download directory, disable notifications, or load the browser in incognito mode. This is particularly useful when tests need consistent browser behavior.
import org.openqa.selenium.WebDriver;
import org.openqa.selenium.chrome.ChromeDriver;
import org.openqa.selenium.chrome.ChromeOptions;
public class ChromeOptionsExample {
public static void main(String[] args) {
ChromeOptions options = new ChromeOptions();
options.addArguments("--incognito");
options.addArguments("--disable-notifications");
WebDriver driver = new ChromeDriver(options);
driver.get("https://example.com");
driver.quit();
}
}
2. Running Selenium Tests in Chrome Headless Mode
Headless mode allows Chrome to run without a visible UI. This speeds up execution on CI servers and makes it easier to run tests in environments without a display. Headless mode is commonly used in pipelines where performance and resource usage matter.
from selenium import webdriver
from selenium.webdriver.chrome.options import Options
options = Options()
options.add_argument("--headless")
driver = webdriver.Chrome(options=options)
driver.get("https://example.com")
print(driver.title)
driver.quit()
3. Handling Pop-Ups, Alerts, and Dialogs in Chrome
Web applications often trigger alerts or confirmation dialogs. Selenium provides switch_to.alert to handle these. ChromeDriver ensures alerts behave the same way as in a real user session, so you can accept, dismiss, or read alert messages during testing.
alert = driver.switch_to.alert
print(alert.text)
alert.accept()
4. Using Chrome DevTools Protocol (CDP) for Advanced Testing
ChromeDriver exposes Chrome DevTools Protocol, giving access to low-level browser features that Selenium alone cannot control. With CDP, you can simulate network conditions, intercept requests, capture console logs, or emulate geolocation. This is useful when tests need to validate behavior under specific conditions.
driver.execute_cdp_cmd("Network.emulateNetworkConditions", {
"offline": False,
"latency": 100,
"downloadThroughput": 50000,
"uploadThroughput": 50000
})
5. Managing Browser Extensions and Geolocation
Sometimes tests must run with specific extensions enabled or simulate a user’s physical location. ChromeOptions allows you to load unpacked extensions, while CDP can be used to override geolocation settings. These features are critical for testing applications that depend on extensions, maps, or region-specific behavior.
How to Launch Chrome Browser with ChromeDriver in Selenium
Launching Chrome with Selenium is the first step before running any test. Once ChromeDriver is set up and configured, creating a new Chrome browser instance becomes straightforward. The process involves initializing the driver and then instructing it to open a URL.
1. Example in Java
import org.openqa.selenium.WebDriver;
import org.openqa.selenium.chrome.ChromeDriver;
public class LaunchChrome {
public static void main(String[] args) {
System.setProperty("webdriver.chrome.driver", "/path/to/chromedriver");
WebDriver driver = new ChromeDriver();
driver.get("https://www.google.com");
System.out.println(driver.getTitle());
driver.quit();
}
}
2. Example in Python
from selenium import webdriver
driver = webdriver.Chrome()
driver.get("https://www.google.com")
print(driver.title)
driver.quit()
3. Adding Options When Launching Chrome
Often you need to launch Chrome with specific options such as incognito mode, disabled notifications, or a custom profile. ChromeOptions provides this flexibility at the time of launch.
from selenium import webdriver
from selenium.webdriver.chrome.options import Options
options = Options()
options.add_argument("--incognito")
options.add_argument("--disable-notifications")
driver = webdriver.Chrome(options=options)
driver.get("https://example.com")
driver.quit()
This is the same mechanism that enables headless mode, proxy settings, or extension loading. Setting options during launch ensures the browser environment matches your test requirements.
Common Challenges in Selenium ChromeDriver
Even with the correct setup, testers often run into problems while working with ChromeDriver. These issues usually appear during version updates, environment setup, or when handling Chrome-specific behaviors. Knowing the common challenges and their causes makes troubleshooting faster.
Below are the typical challenges faced:
- Version mismatch: ChromeDriver must match the installed Chrome browser version. If they do not align, the browser may not launch, and errors like SessionNotCreatedException occur. This often happens after Chrome updates automatically.
- PATH and permissions issues: If the ChromeDriver binary is not in a directory listed in the system PATH, Selenium cannot locate it. On Linux and macOS, execution permissions also need to be set correctly.
- Platform differences: Some Chrome features behave differently on Windows, macOS, and Linux. For instance, headless mode may render pages differently across platforms or versions.
- Unexpected pop-ups and alerts: Authentication dialogs or JavaScript alerts can block the test flow if they are not handled in the script. ChromeDriver will not proceed until the alert is dismissed.
- Resource usage in CI/CD: Running multiple Chrome instances in parallel consumes significant CPU and memory. On shared servers or pipelines, this can slow tests or cause timeouts.
- Unclear error messages: ChromeDriver sometimes returns low-level errors that do not point directly to the root cause. In such cases, testers need to rely on browser logs, driver logs, or DevTools tracing for debugging.
Best Practices for Selenium ChromeDriver
Working with ChromeDriver becomes easier and more reliable when testers follow proven practices. These approaches reduce failures, improve performance, and make tests more maintainable. Here are the key practices to consider:
- Keep ChromeDriver in sync with Chrome: Always ensure the driver version matches the installed Chrome browser. Automating this with WebDriver Manager or CI scripts prevents failures after browser updates.
- Use ChromeOptions consistently: Define browser options such as headless mode, incognito, or custom profiles at the start of every test run. This creates a predictable environment and reduces flakiness.
- Enable verbose logging for debugging: Starting ChromeDriver with logging enabled helps trace network errors, invalid arguments, or rendering issues that are otherwise hard to detect.
- Handle alerts and dialogs in code: Always include alert-handling logic in tests, especially when working with applications that trigger confirmations or authentication dialogs.
- Optimize resource usage in CI/CD: Run tests in headless mode, use containerized environments, and limit parallel sessions based on server capacity to avoid instability.
- Isolate test data and sessions: Launch Chrome with a temporary user profile or clear session data between tests to prevent interference from cached state.
- Validate cross-platform behavior: Run tests across Windows, macOS, and Linux environments when browser-specific rendering or behavior is important for coverage.
Conclusion
Selenium ChromeDriver serves as the communication layer between Selenium WebDriver and the browser, enabling the simulation of real user interactions. To use it effectively, testers must download the correct version, configure it properly, and apply Chrome-specific features like options, headless mode, and DevTools Protocol.
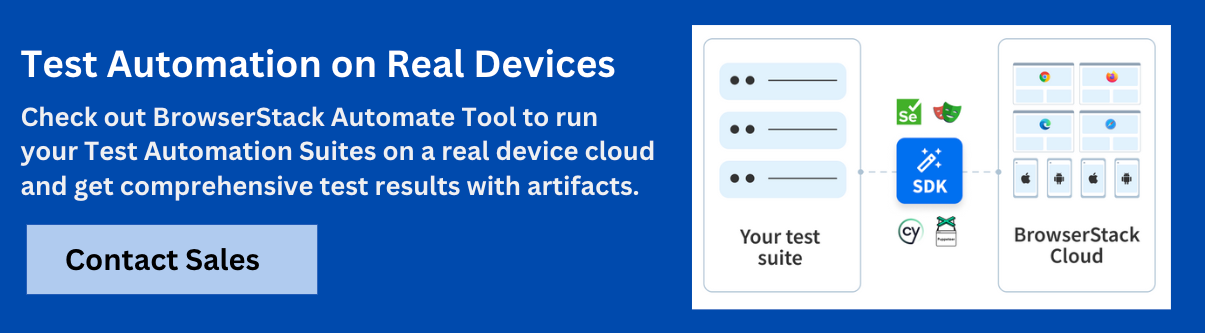
Running tests only on local Chrome setups limits coverage and often leads to environment-specific issues. With BrowserStack, teams can run Selenium tests on 3,500+ real devices and browser combinations, including the latest and older Chrome versions. This ensures tests validate real-world behavior without the burden of managing drivers or infrastructure.
Data-rich bug reports loved by everyone
Get visual proof, steps to reproduce and technical logs with one click


Continue reading


Put your knowledge to practice
Try Bird on your next bug - you’ll love it
“Game changer”
Julie, Head of QA


Overall rating: 4.7/5
Try Bird later, from your desktop