Screenshots in Selenium: Complete Guide

Selenium WebDriver has become a standard choice for automated web testing due to its cross-browser support and language flexibility. In test automation, screenshots serve as an essential debugging and reporting tool.
They provide a visual trail of application behavior during execution, making it easier to identify failures, UI issues, or inconsistencies. In fact, many QA teams consider screenshots indispensable for defect reporting and collaboration with developers.
Run Selenium Tests on Cloud
Why Screenshots Matter in Selenium Automation?
Screenshots add value to test automation in several ways:
- Debugging failed test cases: A screenshot reveals the application’s state at the point of failure, helping pinpoint UI or functional errors.
- Improved reporting: Test execution reports become more informative when screenshots are attached, enabling stakeholders to quickly understand issues.
- Verification of UI consistency: Screenshots help validate that elements render correctly across different browsers and devices.
- Regression tracking: Visual evidence of changes between releases prevents UI regressions from going unnoticed.
Environment Setup for Enabling Screenshots
Before capturing screenshots, the environment must be correctly configured. The essential setup includes:
- Java Development Kit (JDK): Ensure JDK is installed and configured in the system PATH.
- Maven or Gradle: Recommended for managing Selenium dependencies.
- Selenium WebDriver: Add the Selenium Java dependency to your project.
- TestNG (or JUnit): Provides structured test execution and reporting.
- Browser drivers: ChromeDriver, GeckoDriver, or others must be installed and linked.
Sample Maven dependency for Selenium:
<dependency>
<groupId>org.seleniumhq.selenium</groupId>
<artifactId>selenium-java</artifactId>
<version>4.12.0</version>
</dependency>
Techniques to Capture Screenshots with Selenium WebDriver
Selenium provides the TakesScreenshot interface to capture screenshots. The following are standard approaches:
- Full-page screenshot: Captures the visible viewport of the browser.
- Web element screenshot: Captures specific elements like buttons, forms, or error messages.
- On-demand screenshot: Allows testers to take snapshots at critical checkpoints.
- Failure-triggered screenshot: Automatically captures images when tests fail.
Example code snippet:
File screenshot = ((TakesScreenshot) driver).getScreenshotAs(OutputType.FILE);
FileUtils.copyFile(screenshot, new File("screenshot.png"));
Real-World Applications of Screenshot Capture
Screenshots extend beyond debugging, offering real-world benefits such as:
- Documenting defects in bug-tracking tools like Jira.
- Recording visual proof of critical transactions, such as payments.
- Creating automated visual regression tests.
- Generating compliance evidence for regulated industries like banking and healthcare.
Capturing the Entire Web Page
Selenium’s default capability captures only the visible viewport. For full-page screenshots:
- Use WebDriver extensions like AShot.
- Browser-specific options (e.g., Chrome DevTools protocol in Selenium 4).
Code example with AShot:
Screenshot fullPage = new AShot().shootingStrategy(ShootingStrategies.viewportPasting(1000))
.takeScreenshot(driver);
ImageIO.write(fullPage.getImage(), "PNG", new File("fullPage.png"));
Element-Specific Screenshot Capture
Capturing a single element is useful for debugging misaligned components or verifying specific UI states.
WebElement logo = driver.findElement(By.id("siteLogo"));
File elementShot = logo.getScreenshotAs(OutputType.FILE);
FileUtils.copyFile(elementShot, new File("logo.png"));
Generating Screenshots on Test Failures
With TestNG, screenshots can be triggered automatically when a test fails. This can be achieved through listeners (ITestListener) that hook into the test lifecycle.
public void onTestFailure(ITestResult result) {
File screenshot = ((TakesScreenshot) driver).getScreenshotAs(OutputType.FILE);
FileUtils.copyFile(screenshot, new File("failure_" + result.getName() + ".png"));
}
Managing Multiple Screenshots During a Test Session
When handling multiple screenshots in a single test execution:
- Organize by test name and timestamp to avoid overwriting.
- Save in hierarchical directories (e.g., module/testcase).
- Attach screenshots in HTML/PDF reports for streamlined communication.
Capturing Screenshots with TestNG Listeners
TestNG listeners allow screenshot integration with minimal effort. By extending ITestListener, screenshots can be automatically added to reports. This reduces manual intervention while ensuring consistency across test runs.
Handling WebDriver in Parallel Tests (ThreadLocal / Base Class)
When running tests in parallel, screenshots must correspond to the correct test thread. This requires thread-safe WebDriver management:
- ThreadLocal WebDriver: Ensures isolation between parallel threads.
- Base class approach: Centralizes driver creation and teardown for consistency.
Attaching Test Names to Screenshots with ITestResult
Appending the test method name and execution time to the screenshot filename ensures uniqueness and easy traceability.
String fileName = result.getMethod().getMethodName() + "_" + System.currentTimeMillis() + ".png";
End-to-End Example: Implementing Screenshots in Selenium
Building a screenshot implementation in Selenium requires integrating multiple components so that screenshots are consistently captured, organized, and reported. Below is a step-by-step example in Java with TestNG.
1. Setting up WebDriver with TestNG
Start by creating a base class to initialize and quit the WebDriver instance.
public class BaseTest {
protected WebDriver driver;
@BeforeMethod
public void setUp() {
WebDriverManager.chromedriver().setup();
driver = new ChromeDriver();
driver.manage().window().maximize();
driver.get("https://example.com");
}
@AfterMethod
public void tearDown() {
if (driver != null) {
driver.quit();
}
}
}
2. Implementing a Utility Class for Screenshot Capture
A utility class centralizes the logic for taking screenshots, making it reusable across tests.
public class ScreenshotUtil {
public static String captureScreenshot(WebDriver driver, String testName) {
String filePath = "screenshots/" + testName + "_" + System.currentTimeMillis() + ".png";
try {
File src = ((TakesScreenshot) driver).getScreenshotAs(OutputType.FILE);
FileUtils.copyFile(src, new File(filePath));
} catch (IOException e) {
e.printStackTrace();
}
return filePath;
}
}
3. Using TestNG Listeners to Trigger Screenshots on Failure
Listeners allow screenshots to be taken automatically when a test fails.
public class ScreenshotListener implements ITestListener {
@Override
public void onTestFailure(ITestResult result) {
Object testClass = result.getInstance();
WebDriver driver = ((BaseTest) testClass).driver;
String screenshotPath = ScreenshotUtil.captureScreenshot(driver, result.getName());
System.out.println("Screenshot saved at: " + screenshotPath);
}
}
Register the listener in testng.xml:
<listeners>
<listener class-name="com.example.ScreenshotListener"/>
</listeners>
4. Organizing Output in Structured Directories
Screenshots should be stored in a clear directory hierarchy:
- /screenshots/moduleName/testName_timestamp.png
- Separate directories per test suite or module for scalability.
This produces clickable thumbnails in the TestNG HTML report, linking directly to the screenshot file.
Best Practices for Screenshot Management
Capturing screenshots is valuable, but without proper handling, they can quickly become unmanageable. The following practices improve efficiency:
- Use standardized naming conventions: Include test names, timestamps, and statuses (pass/fail) in filenames. Example: LoginTest_Fail_1693647812.png.
- Maintain a clean directory structure: Organize screenshots by test suite, feature, or execution date to simplify traceability.
- Store only relevant screenshots: Avoid unnecessary captures that consume disk space. Focus on failures or key checkpoints.
- Use lightweight image formats: PNG and JPEG formats balance quality and size. Avoid formats like BMP that produce heavy files.
- Integrate screenshots into CI/CD pipelines: Ensure screenshots are accessible from Jenkins, GitHub Actions, or other CI/CD systems. This enables faster debugging of build failures.
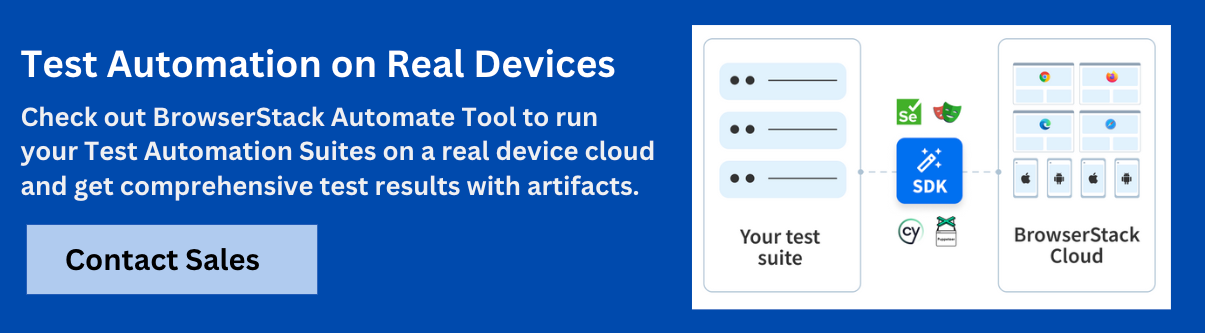
Running Selenium Screenshot Tests on BrowserStack
Testing on local browsers is limited — real-world end-users access applications on a wide variety of devices, operating systems, and browser versions. Running screenshot-enabled Selenium tests on BrowserStack ensures comprehensive coverage.
Key advantages of BrowserStack for screenshot testing
- Instant access to 3000+ real devices and browsers: Eliminate the need to maintain physical labs or VMs.
- Native Selenium WebDriver support: Tests written in Selenium can run without modification on BrowserStack’s grid.
- Cloud-based infrastructure for parallel execution: Capture screenshots across multiple devices and browsers simultaneously, reducing execution time.
- Inbuilt debugging features: Along with screenshots, BrowserStack provides session video recordings, console logs, and network logs, offering complete visibility into test runs.
Example: Running Screenshot Tests on BrowserStack
DesiredCapabilities caps = new DesiredCapabilities();
caps.setCapability("browserName", "Chrome");
caps.setCapability("browserVersion", "latest");
HashMap<String, Object> browserstackOptions = new HashMap<>();
browserstackOptions.put("os", "Windows");
browserstackOptions.put("osVersion", "11");
caps.setCapability("bstack:options", browserstackOptions);
WebDriver driver = new RemoteWebDriver(
new URL("https://hub-cloud.browserstack.com/wd/hub"), caps);
driver.get("https://example.com");
// Capture screenshot
ScreenshotUtil.captureScreenshot(driver, "BrowserStackTest");
driver.quit();
By integrating screenshot capture with BrowserStack’s real device cloud, teams ensure test reliability across real environments while benefiting from instant scalability and reduced maintenance overhead.
Conclusion
Screenshots in Selenium automation are more than just images; they are a critical part of debugging, reporting, and ensuring UI consistency across browsers. By adopting structured techniques, leveraging TestNG listeners, and managing WebDriver correctly in parallel runs, teams can optimize screenshot capture. Combined with BrowserStack’s real device cloud, these strategies enhance the reliability and scalability of automated testing.
Data-rich bug reports loved by everyone
Get visual proof, steps to reproduce and technical logs with one click


Continue reading


Put your knowledge to practice
Try Bird on your next bug - you’ll love it
“Game changer”
Julie, Head of QA


Overall rating: 4.7/5
Try Bird later, from your desktop