Hands-On Guide to JavaScript Executor in Selenium

Automated tests often fail when standard Selenium commands cannot interact with certain elements. A button may be hidden under another layer or a script may prevent normal clicks. In some cases, a page may load dynamic content that Selenium cannot capture directly.
JavaScript Executor provides an alternate path by allowing testers to run JavaScript code inside the browser during execution. It acts as a bridge between Selenium and the browser’s native scripting environment so that actions can be triggered even when the WebDriver API alone falls short.
This guide explains how JavaScript Executor works, when to use it, and the practices that help testers gain reliable results without depending on it unnecessarily.
Run Selenium Tests on Cloud
What is JavaScript Executor in Selenium?
JavaScript Executor is an interface in Selenium WebDriver that lets testers execute JavaScript commands directly within the browser. Instead of relying only on WebDriver methods, it allows direct communication with the Document Object Model (DOM). This makes it possible to perform actions that Selenium alone cannot handle effectively.
It is available through the JavascriptExecutor interface, which every WebDriver implementation already supports. By casting the WebDriver instance to this interface, testers can run custom JavaScript code at runtime.
Here is what JavaScript Executor essentially does:
- Executes JavaScript code: Runs scripts as if they were typed in the browser console.
- Interacts with DOM elements: Finds, modifies, or retrieves properties of elements directly.
- Bypasses WebDriver limitations: Handles scenarios where traditional locators or commands fail.
- Returns values to tests: Sends back results of script execution that can be stored and verified.
Why JavaScript Executor is Important in Automation
Selenium WebDriver covers most interaction needs, but real-world applications often include edge cases where default commands fail. JavaScript Executor fills this gap by offering direct access to the browser’s scripting engine, which helps in handling complex scenarios.
Here are the key reasons it matters in automation:
- Handling dynamic elements: Some elements load late, update frequently, or exist only after AJAX calls. JavaScript Executor can access them instantly through the DOM.
- Working with hidden or disabled components: Certain fields or buttons are intentionally hidden or disabled. JavaScript can change their attributes or trigger actions without waiting for UI changes.
- Scrolling and viewport control: Many pages require scrolling to bring elements into view. JavaScript Executor can control page position precisely, beyond what WebDriver provides.
- Retrieving runtime values: Testers can fetch data directly from the DOM or JavaScript variables, enabling validations that standard WebDriver APIs cannot perform.
- Bypassing limitations of locators: When locators are unstable or blocked by overlays, JavaScript provides a fallback to execute the intended action.
- Improving test stability in specific cases: Some interactions that regularly fail with WebDriver clicks become consistent when triggered through JavaScript.
Core Components of JavaScript Executor
JavaScript Executor in Selenium is built around a few essential parts that define how scripts run inside the browser. Understanding each component and its behavior helps testers apply it effectively in different scenarios.
1. JavascriptExecutor Interface
This interface is the gateway to executing JavaScript in Selenium. Any WebDriver instance, such as ChromeDriver, FirefoxDriver, or EdgeDriver, can be cast to JavascriptExecutor. This means testers do not need extra setup or plugins. Once cast, the WebDriver can run scripts directly in the browser context, providing capabilities beyond standard WebDriver commands.
2. executeScript Method
executeScript runs synchronous JavaScript inside the browser. The test execution pauses until the script finishes. It is suitable for actions that require immediate execution, such as clicking an element, changing attributes, scrolling, or retrieving DOM values.
Arguments can be passed into the script, including WebElements or primitive values, which are automatically converted to their JavaScript equivalents. The return value is also captured and converted back to Java types.
3. executeAsyncScript Method
executeAsyncScript allows asynchronous JavaScript execution. It injects a callback function that must be called within the script, letting the WebDriver wait until a task is complete.
This method is ideal for scenarios where operations take time, such as AJAX requests, animations, or dynamic content loading. Without this, tests might fail because the element or data is not ready when the script runs.
4. Arguments and Return Values
Both executeScript and executeAsyncScript support passing arguments into scripts. Selenium handles type conversion between Java and JavaScript, which simplifies interaction with the DOM.
The returned values follow a similar pattern: strings, numbers, booleans, lists, and WebElements are returned in usable Java forms. Complex objects are serialized, so testers need to handle them appropriately.
5. Browser Support
All major WebDriver implementations support JavascriptExecutor by default. This ensures that scripts run consistently across Chrome, Firefox, Edge, and other browsers without extra configuration. Knowing this reduces dependency on browser-specific hacks and ensures stable automation.
How to Use JavaScript Executor in Selenium
Using JavaScript Executor involves integrating it with standard WebDriver workflows. While this section explains practical steps conceptually, code examples appear in the dedicated examples section.
Step 1: Cast WebDriver to JavascriptExecutor
Casting provides access to executeScript and executeAsyncScript. Code would normally show this cast for ChromeDriver, FirefoxDriver, or EdgeDriver.
Step 2: Decide Between Synchronous and Asynchronous Execution
executeScript is for immediate tasks. executeAsyncScript is for operations that take time. Implementing code here would illustrate choosing the correct method for each scenario.
Step 3: Pass Arguments When Needed
Scripts may require specific WebElements or values. Arguments can be passed, automatically converting Java types to JavaScript equivalents. Example code would show how to pass a WebElement into a script.
Step 4: Handle Return Values
Returned values are converted back to Java-compatible types. Understanding this prevents type mismatches in validations. Example code would show capturing a returned string, number, or WebElement.
Step 5: Integrate With Existing Test Logic
JavaScript Executor complements standard Selenium commands. Using code here would show triggering JavaScript clicks only when elements are hidden or obstructed.
How JavaScript Executor Works Internally
JavaScript Executor works by directly running scripts in the browser, allowing Selenium to interact with the DOM in ways that standard WebDriver commands cannot. Understanding the internal workflow helps testers use it effectively and avoid common pitfalls. Below is the step-by-step process:
- WebDriver Sends Script to Browser: Selenium packages the JavaScript code and any arguments and sends them to the browser via the WebDriver protocol.
- Browser Receives and Evaluates the Script: The browser’s JavaScript engine parses and executes the script in the context of the currently loaded page, running in the main JavaScript thread.
- Synchronous vs Asynchronous Execution: executeScript waits until the script finishes and returns a result immediately. executeAsyncScript injects a callback, letting WebDriver wait until the callback is invoked for asynchronous tasks.
- Interaction With the DOM: The script can query, modify, or trigger events on DOM elements. Changes take effect immediately, allowing Selenium to interact with updated elements.
- Type Conversion Between Java and JavaScript: Arguments are converted from Java to JavaScript types and return values are converted back to Java types. Primitive types, strings, booleans, lists, and WebElements are mapped directly; complex objects are serialized.
- Return Value Processing: The result of the script is sent back to Selenium for validation, further commands, or decision-making.
- Error Handling: Exceptions thrown in the browser are captured by Selenium and reflected in test logs to help diagnose DOM or script issues.
- Performance and Limitations: JavaScript Executor bypasses normal browser events, so overuse can hide real-world issues. Heavy scripts may slow tests, so use selectively.
Common Scenarios for Using JavaScript Executor
Certain interactions in web automation fail or are unreliable when using standard Selenium commands. JavaScript Executor provides a way to handle these scenarios by directly interacting with the DOM. Below are common use cases and how the process works internally:
- Clicking Hidden or Obstructed Elements: Standard WebDriver clicks fail if an element is hidden or covered. JavaScript Executor accesses the element in the DOM and triggers its click() event directly, bypassing visibility restrictions.
- Handling Disabled Fields or Buttons: Forms often have disabled inputs or buttons. JavaScript Executor can remove the disabled attribute or update properties in the DOM, allowing Selenium to perform actions that would otherwise fail.
- Scrolling the Web Page or Element Into View: Elements outside the viewport can cause WebDriver actions to fail. JavaScript Executor adjusts scrollTop or calls scrollIntoView() to bring elements into view before interaction.
- Fetching Dynamic or Runtime Values: Web pages frequently load content asynchronously via AJAX or JavaScript. JavaScript Executor queries the current DOM directly to retrieve values that standard WebDriver might miss.
- Bypassing Locator Limitations: Overlays, unstable locators, or complex DOM structures can prevent WebDriver from finding elements. JavaScript Executor can query elements directly via selectors or DOM properties and perform the required actions.
- Triggering Events Not Supported by WebDriver: Certain custom events or animations may not be triggerable by standard WebDriver commands. JavaScript Executor can invoke these events directly in the DOM, ensuring actions execute as expected.
Code Examples with Explanation
JavaScript Executor is most useful in situations where standard Selenium commands fail, such as interacting with hidden elements or dynamically loaded content. Below are practical examples with working code and detailed explanations.
Example 1: Handling Hidden or Disabled Elements
Sometimes a button or input field is hidden or disabled, preventing Selenium from interacting with it. JavaScript Executor can trigger a click or modify attributes directly in the DOM.
// Cast WebDriver to JavascriptExecutor
JavascriptExecutor js = (JavascriptExecutor) driver;
// Trigger click on a hidden element
WebElement hiddenButton = driver.findElement(By.id("hiddenBtn"));
js.executeScript("arguments[0].click();", hiddenButton);
Explanation:
- The WebDriver element hiddenButton is passed as an argument to the script.
- JavaScript executes click() directly in the browser DOM, bypassing visibility and WebDriver limitations.
- Control returns to Selenium after the action completes, ensuring the test proceeds normally.
Use Case: This is useful for buttons hidden by overlays, modals, or CSS rules, where standard click() would fail.
Example 2: Scrolling a Web Page
Web pages often require scrolling to bring elements into view. JavaScript Executor can manipulate the viewport or scroll an element into view.
JavascriptExecutor js = (JavascriptExecutor) driver;
// Scroll page until element is visible
WebElement element = driver.findElement(By.id("targetElement"));
js.executeScript("arguments[0].scrollIntoView(true);", element);
Explanation:
- scrollIntoView(true) brings the element to the top of the viewport.
- The element’s position is calculated internally by the browser, and Selenium resumes actions after scrolling.
- This avoids ElementNotInteractableException caused by off-screen elements.
Use Case: Useful for forms, tables, or dynamically loaded content where the element is initially outside the visible viewport.
Example 3: Retrieving Dynamic Content
Dynamic pages may update elements asynchronously via JavaScript or AJAX. JavaScript Executor can directly read the current value from the DOM.
JavascriptExecutor js = (JavascriptExecutor) driver;
// Retrieve text from dynamically updated element
String dynamicText = (String) js.executeScript(
"return document.getElementById('dynamicElement').innerText;"
);
System.out.println("Dynamic text: " + dynamicText);
Explanation:
- The script accesses the element by its ID and returns its innerText.
- Selenium receives the value directly, avoiding stale or outdated element references.
- Ensures accurate validations for dynamic content in tests.
Use Case: Validating real-time counters, notifications, or content that loads after AJAX calls.
Best Practices for JavaScript Executor
JavaScript Executor is powerful but should be used selectively. Overreliance can hide issues that would occur in real-world usage. Following these best practices ensures stable, reliable tests.
- Use Only When Necessary: Reserve JavaScript Executor for scenarios where standard WebDriver commands fail, such as hidden elements, disabled fields, or dynamic content. Overusing it can mask real issues.
- Prefer Standard Selenium Commands First: Selenium’s native methods trigger real browser events. Always attempt click(), sendKeys(), or other WebDriver interactions before resorting to JavaScript.
- Handle Return Values Carefully: Scripts return values converted to Java types. Verify types and handle serialized complex objects properly to avoid unexpected errors.
- Use Explicit Waits for Dynamic Content: Even when using JavaScript Executor, ensure that dynamic elements are loaded and ready. Combine it with waits to prevent timing issues.
- Integrate Into Test Flow, Don’t Replace It: JavaScript Executor should complement standard Selenium actions, not replace them entirely. Structure tests so it’s used as a fallback.
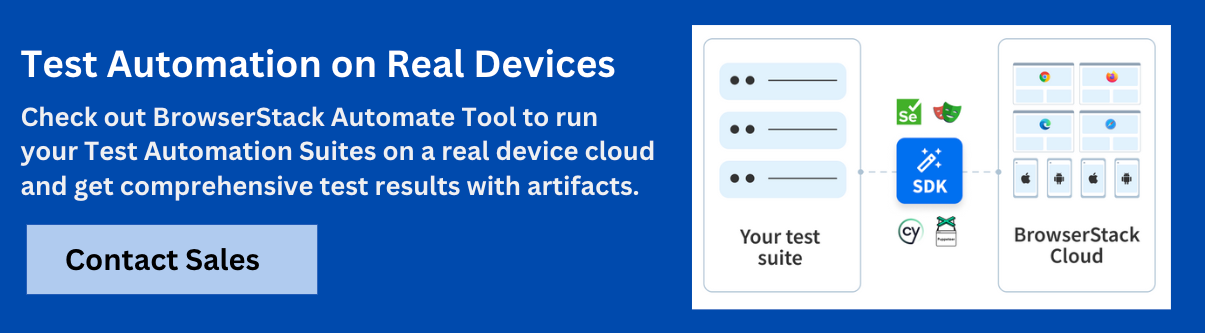
- Validate on Real Devices and Multiple Browsers: Actions performed via JavaScript may succeed in automation but behave differently on actual devices or browsers. Platforms like BrowserStack provide access to real devices and multiple browsers, enabling testers to verify that JavaScript Executor actions work consistently in real-world environments.
Conclusion
JavaScript Executor in Selenium allows interaction with elements and the DOM when standard WebDriver commands fail. It enables clicking hidden elements, scrolling pages, retrieving dynamic content, and triggering events that are otherwise inaccessible.
Validating JavaScript Executor scripts on real devices and multiple browsers ensures they behave as expected. Platforms like BrowserStack allow execution across devices and browser configurations without managing hardware, helping testers catch issues early and maintain confidence in automation results.
Data-rich bug reports loved by everyone
Get visual proof, steps to reproduce and technical logs with one click


Continue reading


Put your knowledge to practice
Try Bird on your next bug - you’ll love it
“Game changer”
Julie, Head of QA


Overall rating: 4.7/5
Try Bird later, from your desktop