Step-by-Step Guide to Using Extent Report in Selenium

Extent Reports in Selenium is a reporting library that provides detailed, interactive test execution results. It allows testers to capture test outcomes with logs, screenshots, and structured visualizations, making it easier to analyze failures and successes.
Unlike simple console outputs or basic reports, Extent Reports offers hierarchical test structures, real-time updates, and multiple formats such as HTML. This enables teams to track automation results efficiently and consistently.
This article explains the setup, configuration, and usage of Extent Reports in Selenium, along with advanced practices like capturing screenshots, logging details, and troubleshooting common issues.
Run Selenium Tests on Cloud
What Is Extent Report in Selenium?
Extent Report in Selenium is a framework-independent library designed to generate interactive and comprehensive test execution reports. The reports include detailed logs, step-wise execution results, timestamps, system information, and visual elements like charts and screenshots.
The key advantage of Extent Reports is that it organizes test information hierarchically. Tests can be grouped into suites, and each test can have multiple steps with individual statuses. This makes it easier for teams to track, analyze, and debug test failures in large automation projects.
Below are the core aspects that define Extent Reports and its value in Selenium testing:
- Hierarchical Test Structure: Supports suites, tests, and steps for organized reporting.
- Detailed Logging: Allows step-wise logging with status levels such as pass, fail, and skip.
- Visual Representation: Provides charts, graphs, and badges for test statistics and execution trends.
- Integration with Frameworks: Works with TestNG, JUnit, and NUnit, enabling flexible reporting.
- Customizable Output: Supports HTML, JSON, and other formats with configurable layouts and themes.
- Screenshot Embedding: Captures and embeds screenshots for failed or critical test steps.
Key Features of Extent Reports in Selenium
Extent Reports offers several features that make it a preferred choice for reporting in Selenium automation projects. These features go beyond simple pass/fail results and provide actionable insights for testers and development teams. Understanding these features helps in leveraging the full potential of Extent Reports. Below are the key features explained in detail:
- Hierarchical Test Representation: Tests can be grouped into suites, and each test can contain multiple steps. This structure helps in analyzing results in a clear, organized manner. For example, a login test can have steps for navigating to the login page, entering credentials, and verifying the dashboard.
- Detailed Logging with Status Levels: Test steps can be logged with status indicators such as pass, fail, skip, or warning. Each log entry can include additional information like execution time or custom messages. This ensures precise tracking of each action performed during testing.
- Visual Reports with Charts and Graphs: Extent Reports generates interactive HTML reports with pie charts, bar graphs, and badges. These visuals help in quickly assessing the overall health of automation tests and understanding trends over multiple runs.
- Screenshot Capture and Embedding: Screenshots can be attached to individual test steps. For example, a failed login step can include a screenshot of the error message, which helps in faster debugging and root cause analysis.
- Framework Integration: It integrates seamlessly with TestNG, JUnit, and NUnit. This allows automatic report generation after test execution without additional manual steps.
- Customizable Themes and Layouts: Users can configure the report’s look and feel, including color themes, logos, and content arrangement. This is useful for aligning reports with organizational standards or presentation needs.
- Real-Time Report Updates: Extent Reports can generate reports dynamically during test execution, allowing testers to monitor progress without waiting for the entire suite to complete.
Installing and Configuring Extent Reports in Selenium
Setting up Extent Reports in Selenium involves adding the required libraries, initializing the reporting objects, and configuring the output location and format. Proper setup ensures that reports capture test execution details accurately and are easy to analyze. Below is a step-by-step explanation of how to install and configure Extent Reports.
1. Adding Extent Reports Dependency
Extent Reports can be added to a project either via Maven or by manually downloading the JAR files. Using Maven is recommended for easier version management.
For a Maven project, include the following dependency in your pom.xml:
<dependency>
<groupId>com.aventstack</groupId>
<artifactId>extentreports</artifactId>
<version>5.0.9</version>
</dependency>
For projects not using Maven, download the JAR from the Extent Reports official repository and add it to your project’s build path.
2. Initializing Extent Reports in Code
Once the dependency is added, you need to create an instance of ExtentReports and configure the report output location.
import com.aventstack.extentreports.ExtentReports;
import com.aventstack.extentreports.ExtentTest;
import com.aventstack.extentreports.reporter.ExtentSparkReporter;
public class ExtentReportSetup {
public static void main(String[] args) {
// Specify the location of the report
ExtentSparkReporter spark = new ExtentSparkReporter("test-output/ExtentReport.html");
// Create ExtentReports instance
ExtentReports extent = new ExtentReports();
// Attach reporter
extent.attachReporter(spark);
// Create a test entry
ExtentTest test = extent.createTest("Login Test")
.assignAuthor("QA Team")
.assignCategory("Functional Test");
// Log steps
test.pass("Navigated to login page");
test.pass("Entered valid credentials");
test.fail("Dashboard did not load");
// Generate the report
extent.flush();
}
}
3. Configuring the Report
The ExtentSparkReporter allows customization of the report appearance:
spark.config().setDocumentTitle("Automation Test Report");
spark.config().setReportName("Regression Suite");
spark.config().setTheme(com.aventstack.extentreports.reporter.configuration.Theme.STANDARD);
- Document Title: Sets the title that appears on the browser tab when the report is opened.
- Report Name: A descriptive name for the suite of tests.
- Theme: Choose between STANDARD (light) and DARK for better readability.
4. Handling Multiple Reports or Test Runs
You can generate multiple reports in a single project by creating different instances of ExtentSparkReporter and attaching them to a single ExtentReports object. This is useful for separating test reports by module, environment, or execution cycle.
5. Directory Structure and Output Management
It is recommended to store reports in a dedicated folder, such as test-output, to keep them organized. Reports can be automatically overwritten or versioned using timestamps:
String timeStamp = new SimpleDateFormat("yyyy.MM.dd.HH.mm.ss").format(new Date());
ExtentSparkReporter spark = new ExtentSparkReporter("test-output/ExtentReport_" + timeStamp + ".html");
This ensures that each test execution generates a unique report without overwriting previous results.
How to Generate Extent Reports
Generating Extent Reports in Selenium involves creating tests, logging steps, and producing the final report file. This process allows testers to capture detailed execution results with status indicators, screenshots, and additional context.
Below is a step-by-step explanation of how to generate Extent Reports effectively.
1. Initialize ExtentReports and Reporter
Before logging any test steps, initialize the ExtentReports and ExtentSparkReporter objects. Specify the report file location and attach the reporter:
ExtentSparkReporter spark = new ExtentSparkReporter("test-output/ExtentReport.html");
ExtentReports extent = new ExtentReports();
extent.attachReporter(spark);
2. Create Test Cases
Each test in your automation suite should have an associated ExtentTest object. This object is used to log individual steps:
ExtentTest loginTest = extent.createTest("Login Test")
.assignAuthor("QA Team")
.assignCategory("Functional Test");
- assignAuthor: Identifies the tester or team responsible for the test.
- assignCategory: Groups tests into functional or regression categories for better organization.
3. Log Test Steps
Log each step of the test with appropriate status levels. Statuses can include pass, fail, skip, or warning. Additional details such as execution messages or exceptions can also be added:
loginTest.pass("Navigated to login page");
loginTest.pass("Entered username and password");
loginTest.fail("Login button not clickable due to overlay");
loginTest.warning("Dashboard load time exceeded threshold");
4. Capture Screenshots (Optional but Recommended)
Screenshots provide visual evidence for test failures or critical steps. Capture screenshots using Selenium and attach them to the report:
TakesScreenshot ts = (TakesScreenshot) driver;
File source = ts.getScreenshotAs(OutputType.FILE);
File destination = new File("screenshots/loginFail.png");
FileUtils.copyFile(source, destination);
loginTest.addScreenCaptureFromPath("screenshots/loginFail.png");
5. Generate the Final Report
After all tests and steps are logged, generate the report by calling flush() on the ExtentReports object. This writes all logs, screenshots, and structured information to the output file:
extent.flush();
6. Organizing Multiple Test Runs
For suites with multiple test cases, create separate ExtentTest objects for each test and log steps independently. This allows the report to display each test case clearly with hierarchical details:
ExtentTest searchTest = extent.createTest("Search Test");
searchTest.pass("Navigated to search page");
searchTest.pass("Entered search keyword");
searchTest.fail("Search results did not load");
By following these steps, testers can generate detailed Extent Reports that provide clear insights into test execution, step-by-step status, and issues encountered. These reports help teams identify failures quickly and maintain historical test execution records.
How to Generate Extent Reports with TestNG
TestNG is one of the most popular frameworks for Selenium automation, and Extent Reports integrates seamlessly with it. Using Extent Reports with TestNG allows testers to capture results for each test method, log steps, and generate structured HTML reports automatically after execution. Below is a detailed guide on how to implement it.
1. Add Dependencies
Ensure both TestNG and Extent Reports dependencies are included in your pom.xml:
<dependency>
<groupId>org.testng</groupId>
<artifactId>testng</artifactId>
<version>7.8.0</version>
<scope>test</scope>
</dependency>
<dependency>
<groupId>com.aventstack</groupId>
<artifactId>extentreports</artifactId>
<version>5.0.9</version>
</dependency>
2. Initialize ExtentReports in a TestNG Listener
Using a TestNG listener ensures that reports are generated automatically for all test methods.
Create a class implementing ITestListener:
import com.aventstack.extentreports.ExtentReports;
import com.aventstack.extentreports.ExtentTest;
import com.aventstack.extentreports.reporter.ExtentSparkReporter;
import org.testng.ITestContext;
import org.testng.ITestListener;
import org.testng.ITestResult;
public class ExtentTestNGListener implements ITestListener {
ExtentReports extent;
ExtentTest test;
@Override
public void onStart(ITestContext context) {
ExtentSparkReporter spark = new ExtentSparkReporter("test-output/ExtentReport.html");
extent = new ExtentReports();
extent.attachReporter(spark);
}
@Override
public void onTestStart(ITestResult result) {
test = extent.createTest(result.getMethod().getMethodName());
}
@Override
public void onTestSuccess(ITestResult result) {
test.pass("Test Passed");
}
@Override
public void onTestFailure(ITestResult result) {
test.fail(result.getThrowable());
}
@Override
public void onTestSkipped(ITestResult result) {
test.skip("Test Skipped");
}
@Override
public void onFinish(ITestContext context) {
extent.flush();
}
}
3. Annotate TestNG Tests
Apply standard TestNG annotations for your Selenium tests. The listener automatically logs test start, success, failure, or skip events:
import org.testng.annotations.Test;
import org.testng.annotations.Listeners;
@Listeners(ExtentTestNGListener.class)
public class LoginTest {
@Test
public void validLoginTest() {
// Selenium steps to perform login
System.out.println("Login steps executed");
}
@Test
public void invalidLoginTest() {
// Selenium steps that intentionally fail
throw new RuntimeException("Invalid login credentials");
}
}
How to Generate Extent Reports with JUnit
JUnit is another widely used framework for Selenium automation. Integrating Extent Reports with JUnit allows testers to capture structured test results, log steps, and generate interactive HTML reports for analysis. The process requires initializing Extent Reports in a setup method and flushing the report after all tests execute.
1. Add Dependencies
Include both JUnit and Extent Reports dependencies in your pom.xml:
<dependency>
<groupId>junit</groupId>
<artifactId>junit</artifactId>
<version>4.13.2</version>
<scope>test</scope>
</dependency>
<dependency>
<groupId>com.aventstack</groupId>
<artifactId>extentreports</artifactId>
<version>5.0.9</version>
</dependency>
2. Initialize ExtentReports in Setup Method
Use the @BeforeClass or @Before annotation to initialize the report before executing tests:
import com.aventstack.extentreports.ExtentReports;
import com.aventstack.extentreports.ExtentTest;
import com.aventstack.extentreports.reporter.ExtentSparkReporter;
import org.junit.BeforeClass;
import org.junit.AfterClass;
public class JUnitExtentReportTest {
static ExtentReports extent;
static ExtentTest test;
@BeforeClass
public static void setup() {
ExtentSparkReporter spark = new ExtentSparkReporter("test-output/ExtentReport.html");
extent = new ExtentReports();
extent.attachReporter(spark);
}
@AfterClass
public static void tearDown() {
extent.flush();
}
}
3. Create Test Methods and Log Steps
Within JUnit test methods, create ExtentTest objects for each test case and log steps with statuses:
import org.junit.Test;
public class LoginTests extends JUnitExtentReportTest {
@Test
public void validLoginTest() {
test = extent.createTest("Valid Login Test");
test.pass("Navigated to login page");
test.pass("Entered valid credentials");
test.pass("Dashboard loaded successfully");
}
@Test
public void invalidLoginTest() {
test = extent.createTest("Invalid Login Test");
test.pass("Navigated to login page");
test.fail("Login failed due to incorrect credentials");
}
}
4. Optional: Capture Screenshots
Screenshots can be captured for failed tests and added to reports for detailed analysis:
// Selenium screenshot capture
TakesScreenshot ts = (TakesScreenshot) driver;
File source = ts.getScreenshotAs(OutputType.FILE);
File destination = new File("screenshots/invalidLogin.png");
FileUtils.copyFile(source, destination);
test.addScreenCaptureFromPath("screenshots/invalidLogin.png");
How to Generate Extent Reports with NUnit
NUnit is a popular testing framework for .NET applications. Integrating Extent Reports with NUnit allows testers to capture structured test results, log execution steps, and generate interactive HTML reports that provide insights into test outcomes. Below is a detailed guide on how to implement Extent Reports in NUnit.
1. Add Dependencies
Include the Extent Reports NuGet package in your .NET project. In Visual Studio, you can run:
Install-Package AventStack.ExtentReports
Ensure NUnit is also installed:
Install-Package NUnit
Install-Package NUnit3TestAdapter
2. Initialize ExtentReports in Setup Method
Use [OneTimeSetUp] or [SetUp] attributes to initialize the report before executing tests:
using AventStack.ExtentReports;
using AventStack.ExtentReports.Reporter;
using NUnit.Framework;
[TestFixture]
public class NUnitExtentReportTest
{
private static ExtentReports extent;
private ExtentTest test;
[OneTimeSetUp]
public void Setup()
{
var spark = new ExtentSparkReporter("TestResults/ExtentReport.html");
extent = new ExtentReports();
extent.AttachReporter(spark);
}
[OneTimeTearDown]
public void TearDown()
{
extent.Flush();
}
}
3. Create Test Methods and Log Steps
Within NUnit test methods, create ExtentTest objects for each test case and log execution details:
[Test]
public void ValidLoginTest()
{
test = extent.CreateTest("Valid Login Test");
test.Pass("Navigated to login page");
test.Pass("Entered valid credentials");
test.Pass("Dashboard loaded successfully");
}
[Test]
public void InvalidLoginTest()
{
test = extent.CreateTest("Invalid Login Test");
test.Pass("Navigated to login page");
test.Fail("Login failed due to incorrect credentials");
}
4. Capture Screenshots
Screenshots can be captured using Selenium WebDriver for .NET and attached to failed steps:
ITakesScreenshot ts = driver as ITakesScreenshot;
Screenshot screenshot = ts.GetScreenshot();
screenshot.SaveAsFile("Screenshots/InvalidLogin.png", ScreenshotImageFormat.Png);
test.AddScreenCaptureFromPath("Screenshots/InvalidLogin.png");
Capturing Screenshots and Test Logs in Extent Reports
Capturing screenshots and logging test steps in Extent Reports adds significant value to test automation. It helps testers quickly identify issues, provides visual evidence for failures, and maintains a detailed execution history.
Below is a detailed explanation of how to implement both effectively.
1. Logging Test Steps
Logging is essential for tracking the progress and outcome of each test step. Extent Reports supports multiple log levels such as pass, fail, skip, and warning.
Example in Java with Selenium:
ExtentTest test = extent.createTest("Login Test");
test.pass("Navigated to login page");
test.pass("Entered valid username and password");
test.fail("Login failed due to incorrect credentials");
test.warning("Dashboard load time exceeded expected threshold");
- Pass: Indicates successful execution of a step.
- Fail: Marks steps that failed and can include exception details.
- Warning: Highlights non-critical issues that may require attention.
- Skip: Logs steps that were skipped during execution.
2. Capturing Screenshots
Screenshots provide visual context for failures or critical actions. Selenium WebDriver supports capturing screenshots using TakesScreenshot.
TakesScreenshot ts = (TakesScreenshot) driver;
File source = ts.getScreenshotAs(OutputType.FILE);
File destination = new File("screenshots/loginFail.png");
FileUtils.copyFile(source, destination);
// Attach screenshot to Extent Report
test.addScreenCaptureFromPath("screenshots/loginFail.png");
3. Combining Logs with Screenshots
For failed steps, combining descriptive logs with screenshots improves clarity and speeds up debugging:
try {
driver.findElement(By.id("loginButton")).click();
test.pass("Clicked login button successfully");
} catch (Exception e) {
test.fail("Failed to click login button: " + e.getMessage());
TakesScreenshot ts = (TakesScreenshot) driver;
File source = ts.getScreenshotAs(OutputType.FILE);
FileUtils.copyFile(source, new File("screenshots/loginButtonFail.png"));
test.addScreenCaptureFromPath("screenshots/loginButtonFail.png");
}
4. Logging Additional Information
You can include system info, environment details, or custom messages to provide context for test execution:
extent.setSystemInfo("OS", "Windows 11");
extent.setSystemInfo("Browser", "Chrome 139");
test.info("Executing login test for production environment");
Capturing both screenshots and detailed logs ensures that Extent Reports serve as a complete record of test execution. It allows testers to quickly identify failure points, reproduce issues, and maintain accountability across test cycles.
Best Practices for Reliable Test Reporting with Extent Reports in Selenium
Following best practices ensures that Extent Reports provide accurate, detailed, and actionable insights for automation testing. Proper implementation improves readability, consistency, and maintainability of test reports.
Below are the key practices to follow:
- Initialize Reports Early: Always set up ExtentReports and attach reporters before executing tests to ensure all steps are captured.
- Log Every Critical Step: Include all important actions and verifications in the report to provide clear traceability of test execution.
- Capture Screenshots Strategically: Take screenshots for failed steps or key milestones only to avoid bloated reports and improve report load times.
- Organize Tests Hierarchically: Group tests into suites, test cases, and steps to improve clarity and navigation within the report.
- Use Descriptive Log Messages: Clear, precise messages help in quickly identifying issues and understanding test behavior.
- Include Environment and System Information: Capture details such as browser version, OS, and test environment to provide context for test execution.
- Maintain Unique Report Files: Use timestamps or unique identifiers in report filenames to prevent overwriting previous executions.
- Integrate with Testing Frameworks Properly: Ensure listeners, setup, and teardown methods are correctly configured for TestNG, JUnit, or NUnit to automatically log test results.
- Monitor Report Size: Avoid excessive logging or unnecessary screenshots to maintain performance and readability of reports.
- Review Reports Regularly: Analyze reports after every execution cycle to detect recurring issues and improve test scripts.
Conclusion
Extent Reports in Selenium provides clear, structured, and interactive test execution results. It captures logs, screenshots, and system information, allowing testers to analyze failures and successes effectively. Its integration with frameworks like TestNG, JUnit, and NUnit ensures flexibility across project setups.
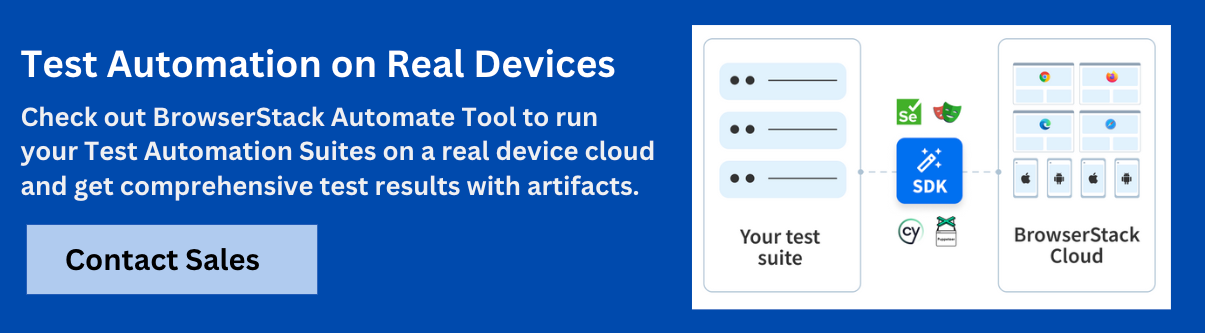
To get more reliable results, run Selenium tests on 3,500+ real devices and browsers with BrowserStack. It accelerates test cycles while expanding coverage, and provides video recordings, screenshots, and network logs for easy debugging.
Data-rich bug reports loved by everyone
Get visual proof, steps to reproduce and technical logs with one click


Continue reading


Put your knowledge to practice
Try Bird on your next bug - you’ll love it
“Game changer”
Julie, Head of QA


Overall rating: 4.7/5
Try Bird later, from your desktop