Complete Guide to ExpectedConditions in Selenium Testing

One of the most common challenges in Selenium testing is handling dynamic web elements that load at different times. Hard-coded waits often make tests brittle, while ignoring synchronization issues leads to flaky results that fail without a real bug in the application. This is where ExpectedConditions become critical.
ExpectedConditions in Selenium WebDriver provide a reliable way to wait for elements or states before proceeding with the next step. Instead of relying on arbitrary timeouts, they help ensure that your tests interact with elements only when they are ready.
This article explains how ExpectedConditions work in Selenium, the different types available, and how to use them effectively to build stable, maintainable test automation.
Run Selenium Tests on Cloud
ExpectedConditions in Selenium WebDriver Explained
In Selenium, an ExpectedCondition is a predefined condition that helps you wait until a certain state is true before continuing with the test. It works with WebDriverWait and allows you to check for specific situations like an element becoming clickable, the visibility of a field, or the presence of text.
Without ExpectedConditions, testers often rely on Thread.sleep() or arbitrary timeouts, which either waste time or fail to account for slow-loading elements. ExpectedConditions solve this by providing targeted checks that wait only as long as needed.
Key Benefits of Using ExpectedConditions in Selenium Tests
Automation tests often fail not because of actual application bugs, but because the test script and the application are not in sync. ExpectedConditions directly address this problem by introducing smart waits that align the test flow with the real behavior of the application under test.
Here are the main benefits of using ExpectedConditions in Selenium:
- Improved test reliability: Instead of relying on fixed delays, tests progress only when the required condition is met. This reduces flaky failures and false alarms.
- Faster execution: Since waits end as soon as the condition is satisfied, the test does not waste time waiting for the maximum timeout.
- Better handling of dynamic elements: Modern applications use AJAX calls, JavaScript rendering, and asynchronous events. ExpectedConditions let you handle these dynamic changes smoothly.
- Cleaner codebase: By replacing multiple if checks and manual timeouts, ExpectedConditions make test scripts easier to read and maintain.
- Closer to real user scenarios: They replicate the way a user interacts with the application, waiting for visibility or clickability instead of arbitrary pauses.
Types of ExpectedConditions
In Selenium, ExpectedConditions are grouped by the kind of event they monitor. Each category targets a specific interaction scenario, which makes it easier to pick the right condition instead of relying on generic waits.
The main types are:
- Element-based conditions: Used when you need to confirm the state of a web element. Examples include checking if an element is visible, clickable, selected, or simply present in the DOM. These conditions are essential because most interactions in a test involve web elements.
- Alert conditions: Handle browser alerts by waiting for them to appear before you switch or act on them. This prevents errors that occur when a test tries to interact with an alert that is not yet ready.
- Frame and window conditions: Useful when an application involves multiple frames or windows. These conditions wait until the correct frame is available, or until a new window is ready, before Selenium attempts to switch context.
- Text and title conditions: Sometimes the wait is for content rather than the element itself. Conditions like waiting for a specific text in an element, or a change in the page title, help confirm that the application has updated as expected.
- Invisibility or absence conditions: Applied when elements must disappear before the next action, such as loaders, splash screens, or modal dialogs. These conditions ensure tests continue only after the blocking element is gone.
Most Commonly Used ExpectedConditions Methods
Below are the ExpectedConditions most test engineers use day to day. For each I explain what it checks, when to use it, common pitfalls, and a short code example in Java and Python.
1. visibilityOfElementLocated(locator)
It checks that the element is present in the DOM and visible on the page.
When to use: before reading text or interacting with an element that must be visible.
Pitfall: visibility does not guarantee the element is clickable. Use elementToBeClickable if you intend to click.
Java example:
WebDriverWait wait = new WebDriverWait(driver, Duration.ofSeconds(10));
WebElement el = wait.until(ExpectedConditions.visibilityOfElementLocated(By.id("username")));
el.sendKeys("tester@example.com");
Python example:
wait = WebDriverWait(driver, 10)
el = wait.until(EC.visibility_of_element_located((By.ID, "username")))
el.send_keys("tester@example.com")
2. elementToBeClickable(locator)
It checks that the element is visible and enabled so it can be clicked.
When to use: before clicking buttons or links.
Pitfall: overlays or invisible elements may still block clicks. Prefer checking for absence of overlays if you see flakiness.
Java example:
WebElement button = wait.until(ExpectedConditions.elementToBeClickable(By.cssSelector(".submit")));
button.click();
Python example:
button = wait.until(EC.element_to_be_clickable((By.CSS_SELECTOR, ".submit")))
button.click()
3. presenceOfElementLocated(locator)
It checks that the element exists in the DOM. Visibility is not required.
When to use: when you only need the node to exist, for example to verify that an element was added to the DOM.
Pitfall: using this before interaction can cause errors if the element is not yet visible.
Java example:
WebElement node = wait.until(ExpectedConditions.presenceOfElementLocated(By.xpath("//div[@data-id='item']")));
Python example:
node = wait.until(EC.presence_of_element_located((By.XPATH, "//div[@data-id='item']")))
4. textToBePresentInElement(locator, text)
It checks that the given text appears inside the target element.
When to use: to wait for dynamic content updates such as status messages or labels.
Pitfall: partial matches can pass unexpectedly. Use exact checks in assertions after the wait if exactness matters.
Java example:
wait.until(ExpectedConditions.textToBePresentInElementLocated(By.id("status"), "Completed"));
Python example:
wait.until(EC.text_to_be_present_in_element((By.ID, "status"), "Completed"))
5. invisibilityOfElementLocated(locator)
It checks that the element is either hidden or removed from DOM.
When to use: to wait for loaders, spinners, or modal dialogs to disappear before proceeding.
Pitfall: if multiple similar elements exist use a more specific locator.
Java example:
wait.until(ExpectedConditions.invisibilityOfElementLocated(By.id("loading-spinner")));
Python example:
wait.until(EC.invisibility_of_element_located((By.ID, "loading-spinner")))
6. alertIsPresent()
It checks that a browser alert is present so you can switch to it safely.
When to use: before calling driver.switchTo().alert() or driver.switch_to.alert.
Pitfall: some frameworks use custom modal dialogs not native alerts. Do not use this for HTML modals.
Java example:
wait.until(ExpectedConditions.alertIsPresent());
Alert alert = driver.switchTo().alert();
alert.accept();
Python example:
wait.until(EC.alert_is_present())
alert = driver.switch_to.alert
alert.accept()
7. frameToBeAvailableAndSwitchToIt(locator or nameOrId)
It checks that the frame is present and Selenium switches context to it.
When to use: before interacting with elements inside an iframe or frame.
Pitfall: nested frames require sequential switching. Always confirm you are in the right frame.
Java example:
wait.until(ExpectedConditions.frameToBeAvailableAndSwitchToIt("paymentFrame"));
driver.findElement(By.id("cardNumber")).sendKeys("4111111111111111");
Python example:
wait.until(EC.frame_to_be_available_and_switch_to_it("paymentFrame"))
driver.find_element(By.ID, "cardNumber").send_keys("4111111111111111")
8. stalenessOf(element)
It checks that the previously referenced WebElement is no longer attached to the DOM.
When to use: when you expect an element to be replaced or refreshed by the app. Use it to avoid StaleElementReferenceException.
Pitfall: you must pass a live WebElement instance. If that element was never attached it will not behave as expected.
Java example:
WebElement old = driver.findElement(By.cssSelector(".result"));
wait.until(ExpectedConditions.stalenessOf(old));
// now find the new element
WebElement fresh = driver.findElement(By.cssSelector(".result"));
Python example:
old = driver.find_element(By.CSS_SELECTOR, ".result")
wait.until(EC.staleness_of(old))
fresh = driver.find_element(By.CSS_SELECTOR, ".result")
9. titleContains(text) and titleIs(text)
It checks that the page title contains or equals the text.
When to use: to confirm navigation or page state changes before continuing.
Pitfall: titles can change slowly on complex single page applications. Consider a longer timeout or verifying element content as well.
Java example:
wait.until(ExpectedConditions.titleContains("Dashboard"));
Python example:
wait.until(EC.title_contains("Dashboard"))
10. numberOfElementsToBeMoreThan(locator, number)
It checks that the count of matching elements exceeds the given number.
When to use: for lists, search results, or table rows that load incrementally.
Pitfall: DOM recycling or virtualized lists can change counts unpredictably. Test against stable markers when possible.
Java example:
wait.until(ExpectedConditions.numberOfElementsToBeMoreThan(By.cssSelector(".row"), 0));
Python example:
wait.until(EC.number_of_elements_to_be_more_than((By.CSS_SELECTOR, ".row"), 0))
How to Use ExpectedConditions in Explicit Waits
Explicit waits in Selenium let you pause until a specific condition is met. This prevents brittle tests that fail because the page was not ready. Instead of using Thread.sleep(), you pair WebDriverWait with an ExpectedCondition.
Basic usage
Java:
WebDriverWait wait = new WebDriverWait(driver, Duration.ofSeconds(10));
WebElement el = wait.until(ExpectedConditions.visibilityOfElementLocated(By.id("username")));
el.sendKeys("tester@example.com");
Python:
wait = WebDriverWait(driver, 10)
el = wait.until(EC.visibility_of_element_located((By.ID, "username")))
el.send_keys("tester@example.com")
Waiting for elements to disappear
Java:
wait.until(ExpectedConditions.invisibilityOfElementLocated(By.id("loader")));
Python:
wait.until(EC.invisibility_of_element_located((By.ID, "loader")))
When you need more control, use FluentWait to adjust polling frequency or ignore specific exceptions, but in most cases WebDriverWait with a clear condition is enough.
How to Create a Custom ExpectedCondition
The built-in conditions cover most use cases, but sometimes you need a check that is specific to your application. In such cases, you can write a custom ExpectedCondition. This allows you to define exactly what “ready” means for your test.
Example in Java
ExpectedCondition<Boolean> valueGreaterThan = driver -> {
String text = driver.findElement(By.id("count")).getText();
return Integer.parseInt(text) > 5;
};
WebDriverWait wait = new WebDriverWait(driver, Duration.ofSeconds(10));
wait.until(valueGreaterThan);
Example in Python
def value_greater_than(locator, threshold):
def _predicate(driver):
text = driver.find_element(*locator).text
return int(text) > threshold
return _predicate
wait = WebDriverWait(driver, 10)
wait.until(value_greater_than((By.ID, "count"), 5))
Custom conditions are useful when you need to:
- Wait for a numeric value or status to reach a threshold
- Verify a specific attribute (like disabled=false)
- Combine multiple checks into one reusable condition
This way, your waits stay meaningful and tailored to the real behavior of the application.
Best Practices for Writing Stable ExpectedConditions
ExpectedConditions are powerful, but if used carelessly they can still cause flaky tests. A few simple practices can make them more reliable:
- Pick the right condition: Do not use presenceOfElementLocated before interaction. If you plan to click, use elementToBeClickable. If you plan to read text, use visibilityOfElementLocated.
- Keep timeouts realistic: Use shorter timeouts for UI actions and longer ones only when the application genuinely takes time, such as for background jobs. Very long waits hide real problems.
- Avoid hard waits: Do not mix Thread.sleep() with ExpectedConditions. This only slows tests and adds fragility.
- Be precise with locators: A vague locator can match multiple elements, leading to unpredictable waits. Use stable and unique locators.
- Encapsulate waits: Wrap common waits into utility methods like waitForClickable(locator) so your test scripts stay clean and consistent.
How Testing on Real Devices Improves Reliability
Even with well-written ExpectedConditions, tests can behave differently across environments. Local runs often miss issues that appear on actual devices or browsers with different performance, rendering engines, or network conditions.
Running tests on real devices and browsers ensures that:
- Synchronization checks reflect actual user experience rather than ideal lab conditions
- Dynamic elements load and behave as they do in production
- Edge cases caused by browser differences are caught early
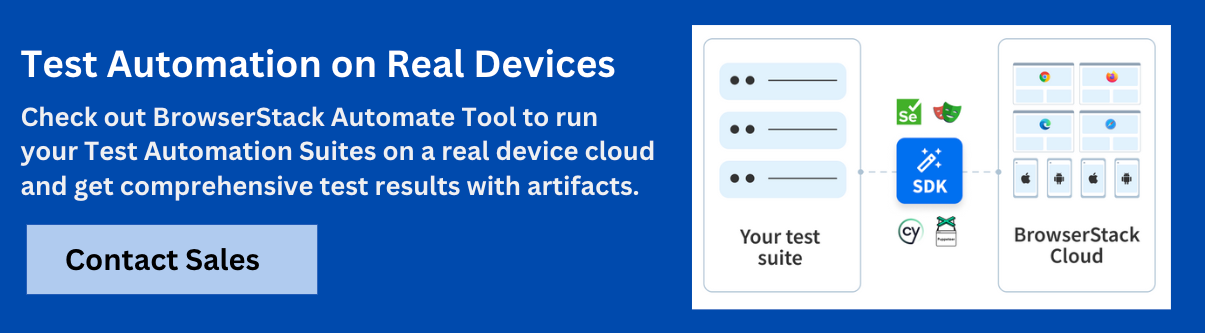
A practical way to achieve this is by using platforms like BrowserStack, which provide access to thousands of real devices and browsers in the cloud. Instead of maintaining your own lab, you can run Selenium tests on real environments, validate ExpectedConditions against real-world behavior, and debug issues with screenshots, logs, and video recordings.
Conclusion
ExpectedConditions are one of the most practical tools for handling synchronization in Selenium tests. They replace brittle hard waits with targeted checks, making scripts faster, cleaner, and more reliable. From simple visibility checks to custom conditions tailored for specific workflows, they ensure that your automation interacts with elements only when they are ready.
When paired with real device testing through platforms like BrowserStack, these waits become even more valuable. You not only verify that the application behaves as expected, but also confirm that it works consistently across browsers and environments.
Data-rich bug reports loved by everyone
Get visual proof, steps to reproduce and technical logs with one click


Continue reading


Put your knowledge to practice
Try Bird on your next bug - you’ll love it
“Game changer”
Julie, Head of QA


Overall rating: 4.7/5
Try Bird later, from your desktop