Maestro Real iOS Device Testing: Setup and Best Practices

Testing on real iOS devices is essential for reliable Maestro automation, as it interacts directly with app components and system APIs. Simulators cannot fully replicate gestures, notifications, or device-specific behavior, making physical devices critical for accurate results.
However, running Maestro tests on iOS devices requires provisioning certificates, registering devices, and handling different OS versions. These steps can be tricky, and setting up tests in CI/CD pipelines needs careful configuration to keep results stable and consistent.
This article explores Maestro support for real iOS devices, setup steps, and practical best practices.
Run Selenium Tests on Cloud
Importance of Real iOS Device Testing in Maestro
Testing on real iOS devices ensures Maestro automation interacts with apps exactly as end users do. This approach uncovers issues that simulators cannot reproduce and provides more reliable test outcomes.
- Accurate User Interaction: Maestro can execute taps, swipes, scrolling, and device rotations exactly as a user would. Real devices allow detection of gesture-related issues that simulators often miss.
- UI Consistency Validation: Physical devices expose layout shifts, overlapping elements, and rendering differences across iPhone models. Testing on real devices ensures the interface looks and behaves as intended for all users.
- Performance Insights: Real devices provide meaningful data on app responsiveness, memory consumption, CPU usage, and battery drain under real operating conditions. This helps optimize performance before release.
- Early Defect Detection: Crashes, freezes, and platform-specific bugs often appear only on physical hardware. Detecting these early reduces post-release failures.
- Reliable Test Results: Tests on real devices produce consistent, reproducible results that mirror real-world behavior, increasing confidence in automation accuracy.
Challenges in Running Maestro Tests on Real iOS Devices
Maestro does not natively support direct execution on physical iOS devices. Running tests requires additional setup, workarounds, or external device infrastructure. This introduces several limitations that teams need to address.
- No Native Real-Device Support: Maestro primarily automates apps on simulators or via cloud infrastructure. Direct execution on local iOS devices is not built-in, requiring third-party tools or device farms.
- Provisioning and Certification Hurdles: Real devices need valid provisioning profiles, certificates, and registered UDIDs. Managing these across multiple devices is complex and error-prone.
- Device and OS Fragmentation: Variations in iPhone and iPad models, screen sizes, and iOS versions can cause inconsistencies in element detection and UI behavior.
- CI/CD Integration Challenges: Automating tests on real devices within pipelines requires careful configuration. Without proper setup, tests can fail or produce unreliable results.
- Debugging and Stability Concerns: Tests may behave differently on actual hardware. Device-specific quirks, memory constraints, and OS behaviors can complicate troubleshooting and reduce stability.
Creating Reliable Test Scenarios for Real iOS Devices
Designing reliable test scenarios for real iOS devices requires careful planning. Physical devices behave differently than simulators, so tests must account for these differences to produce accurate and actionable results.
- Prioritize Critical User Flows: Focus on the most commonly used or high-impact features. For example, login, payment, or navigation flows often uncover the most serious bugs. Testing less-used features first can waste time and provide limited value.
- Use Clear Element Identifiers: Accessibility labels, unique IDs, and static text ensure Maestro can locate elements consistently. Without this, tests may fail due to minor UI shifts or device-specific rendering differences.
- Account for Device Variations: Different iPhone models and iOS versions can affect layout, gestures, and performance. Creating adaptive scenarios for multiple resolutions avoids false negatives and ensures coverage across the device landscape.
- Incorporate Realistic Interactions: Simulate actual user behavior, including swipes, pinches, notifications, and device rotations. Ignoring these interactions can miss critical usability issues or crashes that only appear on physical devices.
- Modularize Test Flows: Break complex flows into reusable modules. This improves maintainability, simplifies debugging, and allows targeted reruns when a failure occurs on a specific device or OS version.
Setting Up Maestro for Real iOS Device Testing
Once the test scenarios are defined and structured to handle real-device behavior, the next step is to configure Maestro and prepare the environment to execute these plans effectively.
Here’s how:
- Provisioning Profiles and Certificates: Ensure each device has a valid provisioning profile and certificate installed. Maestro cannot execute tests without proper device registration.
- Device Registration: Add all physical devices’ UDIDs to your Apple Developer account. Only registered devices can be targeted for real-device testing.
- App Installation: Install the app on the real device manually or via Xcode. Maestro requires the app to be present and accessible for automation.
- Environment Configuration: Set the Maestro CLI or configuration files to point to the target device. For example, specifying a device in YAML:
device:
name: "iPhone 14"
os: "iOS 17.0"
app:
path: "./MyApp.app"
- Using Device Farms (Optional): For scaling, integrate with cloud device providers like BrowserStack to avoid manual device management. Maestro can target these remote devices with minimal local setup.
Creating Maestro Test Scripts for Real iOS Devices
Developing scripts involves translating your planned test scenarios into executable flows in Maestro.
- Define Test Steps Clearly: Use descriptive actions to simulate user behavior, like taps, swipes, or text entry.
- Target Elements Reliably: Use accessibility IDs or labels to ensure consistent identification across devices. Example snippet:
- tap:
id: "loginButton"
- type:
id: "usernameField"
text: "testuser"
- type:
id: "passwordField"
text: "password123"
- tap:
id: "submitButton"
- Incorporate Assertions: Validate expected outcomes, such as element visibility or text values, to catch failures early.
- assert:
id: "welcomeMessage"
text: "Welcome, testuser!”
- Modularize Scripts: Break flows into reusable modules to simplify maintenance and reruns. For example, separate login flow from checkout flow for easier debugging.
- Device-Specific Adaptations: Account for screen size, orientation, and OS version differences within the script logic if needed.
How to Run Maestro Tests on Real iOS Devices
After configuring the environment and preparing test scripts, the next step is to execute these tests on real iOS devices to ensure accurate results across multiple models and OS versions.
However, Maestro does not natively support running tests directly on physical iOS devices. Limitations include the need for provisioning profiles, registered UDIDs, and handling device/OS fragmentation, which makes local real-device testing complex and time-consuming. Teams often struggle to maintain stable CI/CD pipelines and manage multiple devices for coverage.
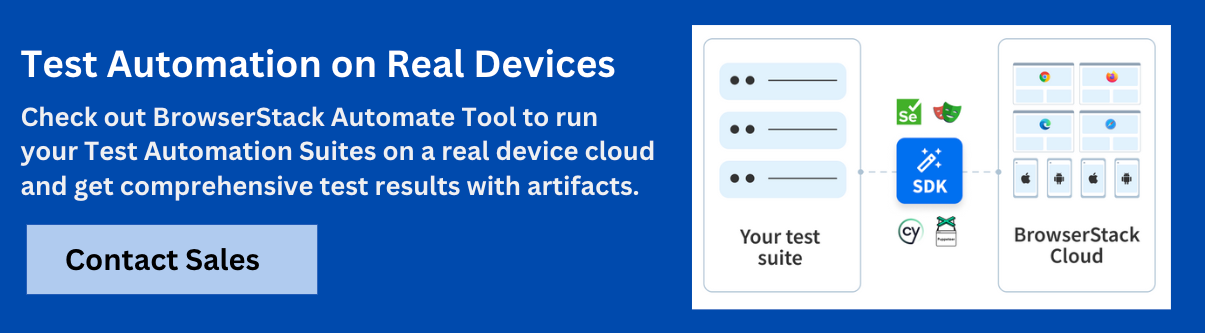
BrowserStack App Automate solves these challenges by providing access to 3,500+ real iOS devices in the cloud. It eliminates the need to manage hardware, certificates, or multiple OS versions locally, allowing teams to run Maestro tests reliably and at scale.
Follow these steps to run Maestro tests on real iOS devices with BrowserStack:
1. Upload Your iOS App
Your app needs to be available on BrowserStack for Maestro to run tests. Upload your .ipa file via the REST API or App Management interface. After uploading, note the app_url that uniquely identifies your build.
2. Prepare and Upload Your Test Suite
Organize all your Maestro flow files into a single folder and compress it as a .zip. Upload this test suite to BrowserStack and save the test_suite_url. Correct folder structure is critical for Maestro to locate and execute all flows.
3. Set Up Local Testing (if needed)
For apps hosted on private servers or behind firewalls, establish a secure connection using BrowserStack Local. Start the binary on your machine and enable "local": "true" in your API request to ensure the tests can access internal resources.
4. Execute Tests on Real Devices
Trigger test runs by specifying your app URL, test suite URL, and target devices. For example, to run on an iPhone 15 with iOS 17:
curl -u "username:accessKey" \
-X POST "https://api-cloud.browserstack.com/app-automate/maestro/v2/ios/build" \
-H "Content-Type: application/json" \
-d '{
"app": "bs://app_url_here",
"testSuite": "bs://test_suite_url_here",
"project": "Maestro_Test",
"devices": ["iPhone 15-17.0"],
"execute": ["path/to/flowfile.yml"]
}'
Tests can be run sequentially or in parallel to optimize execution time.
Best Practices for Maestro Real iOS Device Testing
Testing on real iOS devices with Maestro can be complex, but following these best practices ensures stability, reliability, and accurate results.
- Prioritize Critical User Flows: Focus on high-impact features like login, checkout, or navigation. Testing less important flows first wastes time and resources.
- Use Stable Element Identifiers: Leverage accessibility IDs, labels, or unique identifiers. Avoid relying on dynamic UI elements or text that may change across devices.
- Test Across Device Variations: Include different iPhone/iPad models, screen sizes, and iOS versions to detect layout shifts and OS-specific issues.
- Modularize Test Flows: Break large test suites into reusable modules. This simplifies debugging, maintenance, and reruns when failures occur on specific devices.
- Simulate Realistic Interactions: Incorporate gestures, rotations, notifications, and system interactions that reflect real user behavior.
- Maintain CI/CD Integration: Ensure device configurations, provisioning, and test environment variables are correctly set for automated pipelines.
- Monitor and Analyze Results Carefully: Review logs, screenshots, and videos for device-specific issues, performance bottlenecks, and intermittent failures.
Conclusion
Real iOS device testing with Maestro is essential for accurate, reliable automation. Physical devices capture gestures, notifications, performance metrics, and device-specific behaviors that simulators cannot replicate.
BrowserStack App Automate simplifies real-device testing by providing instant access to thousands of iOS devices in the cloud. It removes the complexity of provisioning, device management, and OS fragmentation, enabling teams to run Maestro tests at scale with consistent results and seamless CI/CD integration.
Data-rich bug reports loved by everyone
Get visual proof, steps to reproduce and technical logs with one click


Continue reading


Put your knowledge to practice
Try Bird on your next bug - you’ll love it
“Game changer”
Julie, Head of QA


Overall rating: 4.7/5
Try Bird later, from your desktop