Maestro Flutter Testing: Ultimate Guide

Flutter applications are increasingly used for building cross-platform mobile experiences. Ensuring their functionality and UI stability requires thorough testing that goes beyond basic unit checks. Maestro provides a way to automate end-to-end mobile testing, enabling testers to validate user flows, interactions, and app behavior across iOS and Android.
Maestro uses a command-driven approach, making it possible to define test flows in a structured, readable format. This reduces the effort needed to maintain tests as the app evolves. Its support for accessibility-driven interactions allows tests to target UI elements reliably, even in dynamic or complex layouts.
The following guide explores Maestro Flutter testing in depth, covering setup, core commands, typical testing scenarios, and advanced techniques.
Run Selenium Tests on Cloud
Maestro Flutter Testing Fundamentals
Maestro is a mobile UI testing framework that supports end-to-end automation across iOS, Android, and Flutter applications. It is not specific to Flutter but works effectively with Flutter apps by interacting with UI elements through accessibility labels and semantic information.
Maestro uses a declarative YAML format to define test flows. Testers describe sequences of actions and validations in a readable format, making it easier to maintain tests as the app grows. Its design focuses on reliability, enabling tests to handle dynamic content, animations, and asynchronous updates without breaking.
Here are the key fundamentals of using Maestro for Flutter testing:
- Declarative Test Flows: Tests are written in YAML files that define a sequence of actions and assertions. This structure makes tests easier to read, share, and maintain.
- Accessibility-Driven Interaction: Maestro interacts with UI elements via accessibility labels. For Flutter apps, wrapping widgets in Semantics ensures elements can be identified reliably, reducing test fragility.
- Cross-Platform Testing: Maestro supports running the same test suite on both iOS and Android devices, ensuring consistent coverage without rewriting tests for each platform.
- Automatic Waiting and Resilience: Tests automatically wait for elements to appear and retry actions when necessary. This reduces flakiness caused by animations, delayed content, or network-dependent UI updates.
- Extensibility: While Maestro provides built-in commands for common actions like tapping, scrolling, and input, testers can extend functionality with custom scripts or integrate with backend systems for more complex scenarios.
Advantages of Using Maestro for Flutter Testing
Maestro for Flutter testing provides reliable and scalable test automation. Its accessibility-driven interactions with cross-platform support and built-in resilience address common mobile testing challenges.
Below are the key advantages that make Maestro a practical choice for Flutter applications:
- Reliable Interaction with UI Elements: Maestro leverages accessibility labels to identify widgets, reducing the risk of tests breaking due to layout changes or widget tree updates. This approach ensures more stable test execution over time.
- Cross-Platform Coverage: A single Maestro test suite can run on both iOS and Android devices without modification. This eliminates duplication of effort and ensures consistent validation across platforms.
- Declarative and Readable Test Flows: Writing tests in YAML makes them easy to read, review, and maintain. Teams can quickly understand the sequence of actions, making collaboration between developers and testers smoother.
- Automatic Handling of Timing Issues: Mobile apps often include animations, asynchronous data loading, and dynamic content. Maestro automatically waits for elements to appear and retries actions when needed, minimizing flaky test results.
- Rapid Iteration and Quick Feedback: Tests execute quickly, and updates to test files are interpreted without the need for compilation. This allows teams to iterate on tests and receive feedback faster, supporting agile development cycles.
- Extensibility for Complex Scenarios: Beyond standard interactions, Maestro supports custom scripts and integration with external tools, enabling tests that validate backend-driven behavior, multi-step workflows, or advanced UI patterns.
- Ease of Maintenance: Changes in the app’s UI or workflow can often be accommodated by updating labels or commands in a single YAML file, avoiding widespread test rewrites and reducing maintenance overhead.
Setting Up Maestro for Flutter Projects
Before creating tests, Maestro must be installed and configured for the Flutter project. Proper setup ensures that tests can interact reliably with UI elements and run consistently across devices. Maestro works by connecting to the mobile app either via an installed APK or IPA or by running the app in a simulator or emulator.
Below are the key steps to set up Maestro for Flutter testing:
- Install Maestro CLI: Download and install the Maestro command-line interface for your operating system. This provides the tools to run, record, and manage tests.
- Add App to Project: Provide the compiled Flutter app binary to Maestro. For Android, this is typically an APK file. For iOS, an IPA file is required. Maestro uses these binaries to launch the app and execute tests.
- Annotate Widgets with Semantics: In Flutter, ensure interactive widgets are wrapped in Semantics with meaningful labels. This allows Maestro to identify and interact with UI elements accurately.
- Connect Devices or Simulators: Tests can run on physical devices or emulators/simulators. Ensure that Maestro can detect connected devices and has necessary permissions to control them.
- Verify Environment: Run a basic Maestro test to confirm the setup. This could involve launching the app and checking for the presence of a key UI element. Successful execution confirms that Maestro is correctly integrated with the Flutter project.
Basic Maestro Commands for Flutter Applications
Once Maestro is set up, testers interact with Flutter apps using a set of basic commands. These commands simulate user actions and perform verifications, forming the foundation of end-to-end testing. Understanding how to use these commands effectively ensures tests are stable, readable, and maintainable.
Below are the commonly used Maestro commands for Flutter applications:
- Tap: Simulates a tap on a UI element identified by its accessibility label. For example, tapping a login button triggers the corresponding action without relying on screen coordinates.
- Type: Enter text into input fields. By targeting elements with semantic labels, this command reliably populates text fields across different devices.
- Scroll: Moves through lists or scrollable views. Maestro automatically calculates the direction and distance based on the target element, reducing the need for manual scroll adjustments.
- WaitFor: Pauses the test until a specified element appears on screen. This is crucial for Flutter apps where content loads asynchronously or animations delay visibility.
- AssertExists: Checks if a UI element is present. This command helps validate that key elements, such as buttons or messages, are correctly displayed after an action.
- AssertText: Verifies that a UI element contains the expected text. Useful for validating dynamic content or confirming that actions produce the correct output.
- Swipe: Performs swipe gestures on elements, useful for carousels or horizontally scrollable lists. Maestro calculates the gesture based on element dimensions and screen coordinates.
- Screenshot: Captures the current screen state. This can be used for visual verification or to document test results.
Common Flutter Testing Scenarios with Maestro
Flutter applications often include dynamic content, multi-step workflows, and platform-specific behaviors. Maestro can handle these scenarios reliably when tests are structured to simulate realistic user interactions. Understanding typical scenarios helps testers design comprehensive and effective test suites.
Below are common Flutter testing scenarios using Maestro:
- Login and Authentication Flows: Automate the process of entering credentials, handling validation errors, and verifying successful login. Using commands like Type, Tap, and AssertExists ensures all steps are validated without relying on visual cues alone.
- Form Submission and Validation: Test complex forms with multiple input types, dropdowns, checkboxes, and required fields. Use Type for text fields, Tap for buttons, AssertText for validation messages, and WaitFor to handle asynchronous updates.
- Navigation Between Screens: Verify that navigating between screens works as expected. Maestro can check for the presence of specific elements after transitions to ensure the correct screen is displayed and user flows are intact.
- List and Scroll Verification: Test scrollable lists, infinite scrolls, or paginated content. Scroll and AssertExists commands validate that all items load correctly and that interactions with list items trigger expected behaviors.
- Dynamic Content Updates: Flutter apps often update UI based on network responses or state changes. WaitFor combined with assertions ensures tests adapt to changing content without failing due to timing issues.
- Error Handling and Alerts: Automate the handling of error messages, alerts, or dialogs. Maestro can detect pop-ups, verify their content, and perform appropriate actions like dismissing or tapping confirmation buttons.
- Logout and Session Management: Verify logout functionality and session expiration handling. Testing these flows ensures users are redirected correctly and sensitive data is protected.
Advanced Maestro Testing Techniques
Beyond basic commands, Maestro offers advanced techniques that allow testers to handle complex workflows, dynamic content, and integration with external systems. Applying these techniques ensures tests remain reliable and maintainable even as applications scale in complexity.
Below are some advanced Maestro testing techniques for Flutter applications:
- Conditional Logic: Use conditional checks to perform different actions based on the presence or state of UI elements. This is useful for flows where the app may display different screens or messages depending on user input or backend responses.
- Loops and Iterations: Automate repetitive tasks, such as filling multiple form entries or verifying a list of items. Loops help reduce redundancy in test definitions and simplify maintenance.
- Parameterized Tests: Pass variables or data sets into test flows to validate multiple scenarios without duplicating code. For example, testing login with multiple user accounts or validating different form inputs can be managed efficiently.
- Waiting Strategies for Dynamic Content: Combine WaitFor with retries or timeouts to handle asynchronous updates, animations, or network-dependent elements. This ensures tests do not fail due to temporary delays or slow responses.
- Integration with Backend or APIs: Validate that UI changes correspond to backend state by integrating Maestro with API responses or databases. This technique ensures end-to-end verification beyond the frontend.
- Custom Commands and Scripts: Extend Maestro with custom JavaScript injections for actions not supported natively. This allows testers to handle unique workflows or interact with complex widgets.
Maestro Testing Constraints
While Maestro is effective for automating Flutter tests, it has some limitations that testers must be aware of. Understanding these constraints ensures more stable and scalable testing strategies.
Below are common constraints and practical solutions:
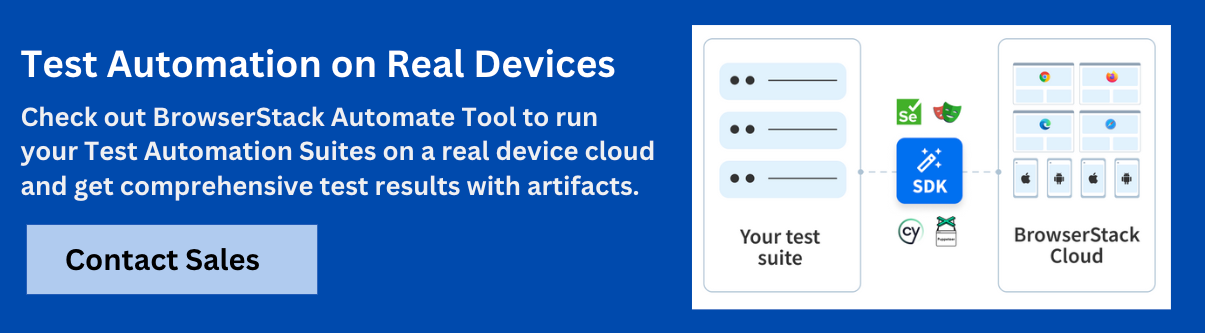
- Limited Real Device Coverage: Maestro runs tests on connected devices or emulators, which can make testing across a wide range of real devices challenging. This can be addressed by using device farms or cloud platforms like BrowserStack App Automate, which provides access to thousands of real Android and iOS devices, allowing tests to run on multiple OS versions and screen sizes without additional hardware.
- Handling Asynchronous UI Updates: Flutter apps often include animations, delayed content loading, or state changes, which can cause tests to fail if elements are not immediately available. Using WaitFor and retry mechanisms within Maestro helps synchronize tests with the app’s UI state to ensure reliability.
- Dynamic Content and Network Dependence: Elements generated from APIs or remote data sources may vary between test runs, causing instability. Integrating mocks or stubs for backend data or using controlled backend responses allows tests to remain predictable and stable.
- Complex Gesture Simulation: Multi-touch gestures, swipes, or drag-and-drop actions may be difficult to implement consistently across devices. Maestro supports basic swipe and scroll commands, and using cloud platforms like BrowserStack enables testing of advanced gestures on real devices for accurate validation.
- Test Maintenance Over Time: Changes in the Flutter widget tree or UI labels can break tests. Ensuring consistent use of Semantics widgets for all interactive elements and referencing labels rather than positions helps reduce test fragility. Regularly updating YAML flows further maintains test reliability.
Best Practices for Maestro Flutter Testing
Creating reliable and maintainable tests in Maestro requires more than just following commands. Applying best practices ensures that test suites remain robust as Flutter applications grow and evolve. Proper practices reduce flaky tests, simplify maintenance, and improve overall test coverage.
Below are key best practices for Maestro Flutter testing:
- Use Semantic Labels Consistently: Wrap interactive widgets with Semantics and assign meaningful labels. This ensures that Maestro can identify elements reliably across screens and devices.
- Keep Test Flows Focused: Design YAML test files to cover specific flows or features rather than combining unrelated actions. Focused tests are easier to read, maintain, and debug.
- Leverage Reusable Components: Create reusable sequences for common actions like login, navigation, or form submission. Reusing components reduces duplication and simplifies updates when workflows change.
- Parameterize Tests: Use variables or data sets to test multiple scenarios without duplicating YAML files. This enables efficient coverage of different inputs, user roles, or device configurations.
- Capture Evidence for Debugging: Include screenshots or logs at critical steps to help diagnose failures quickly. Visual evidence can be invaluable for identifying UI regressions or workflow errors.
- Integrate with CI/CD: Run Maestro tests as part of the continuous integration pipeline to catch issues early. Combine with cloud device platforms like BrowserStack for parallel execution and access to a broader range of devices.
Conclusion
Maestro enables reliable Flutter testing through declarative YAML flows, accessibility-driven interactions, and cross-platform support. Advanced techniques and best practices allow testers to build maintainable, scalable test suites that adapt to evolving applications.
For broader device coverage, faster execution, and detailed debugging, BrowserStack App Automate complements Maestro. It provides real devices, logs, video recordings, and CI/CD integration, helping teams scale testing, reduce flakiness, and deliver high-quality Flutter apps.
Data-rich bug reports loved by everyone
Get visual proof, steps to reproduce and technical logs with one click


Continue reading


Put your knowledge to practice
Try Bird on your next bug - you’ll love it
“Game changer”
Julie, Head of QA


Overall rating: 4.7/5
Try Bird later, from your desktop